If you want to access files on your computer from your television, Amazon FireTV, or Android TV Stick at home and don’t have a NAS, you can easily solve this using the Windows file sharing feature.
The only thing you need is a powered-on Windows PC. Optionally, the files can also be stored on an external hard drive instead on your local C drive.
Buy Amazon Fire TV Stick
You can purchase the Fire TV Stick on Amazon. The FireTV Stick is available in different versions: Lite, Standard, and 4k. The Lite version does not have the ability to control the television, so you can’t adjust the TV’s volume using the FireTV Stick remote. The FireTV 4k Stick is an improved version of the FireTV Stick that also supports playing 4k videos or connecting to 4k televisions. Personally, I would recommend the 4k version to everyone because it offers more power. Even if you don’t currently own a 4k TV, you can still fully utilize it with a new 4k TV in the future.
I also advise buying the FireTV Stick when it’s on sale, you can save up to 50% at times. The FireTV Stick is relatively affordable compared to other Android TV devices, especially when purchased on sale, and it offers modern features. If you don’t have the option to connect the FireTV Stick to a Wi-Fi network, you can still connect it to a network using an adapter and an Ethernet cable. However, the transfer rate in this case is limited to 100Mbps.
*Affiliate Links
Enable Network Sharing
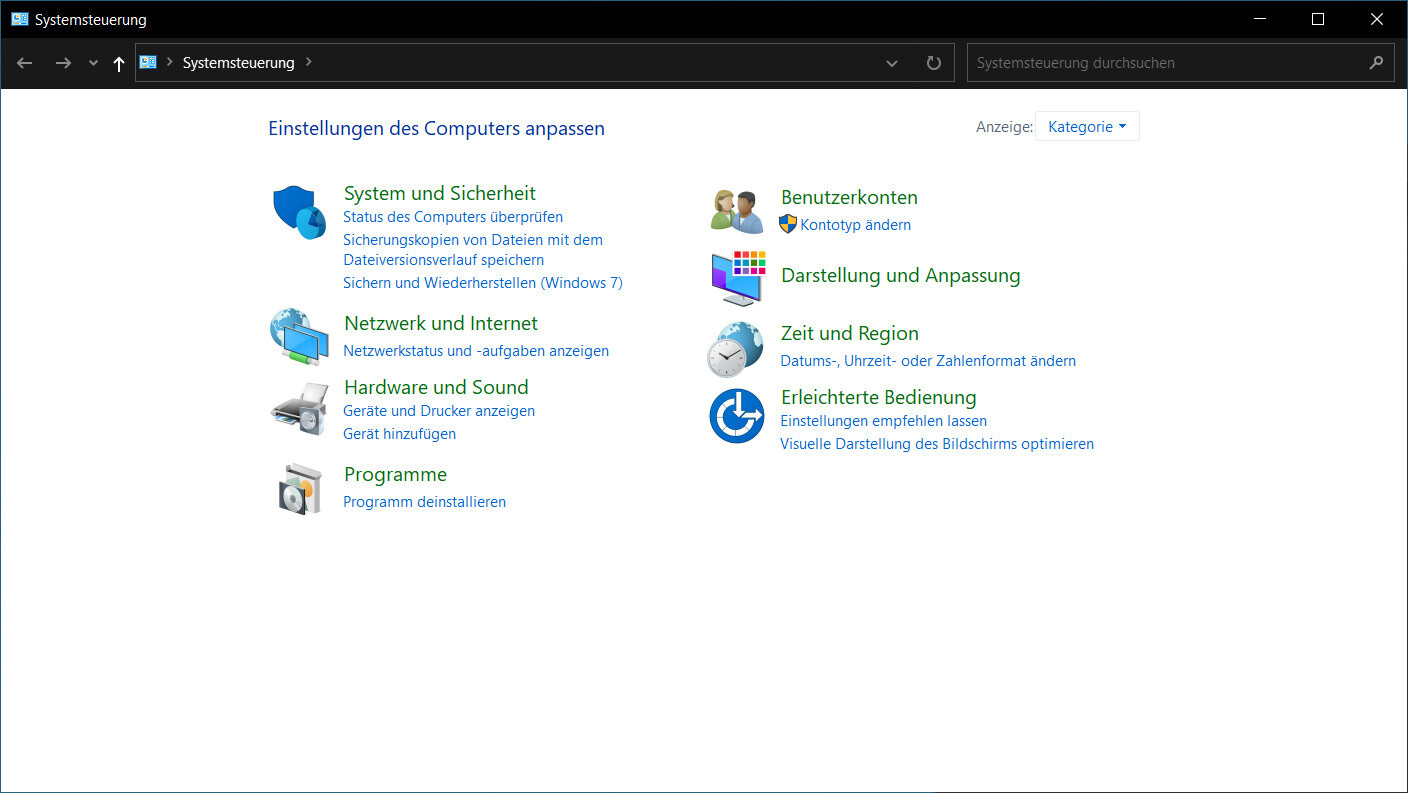
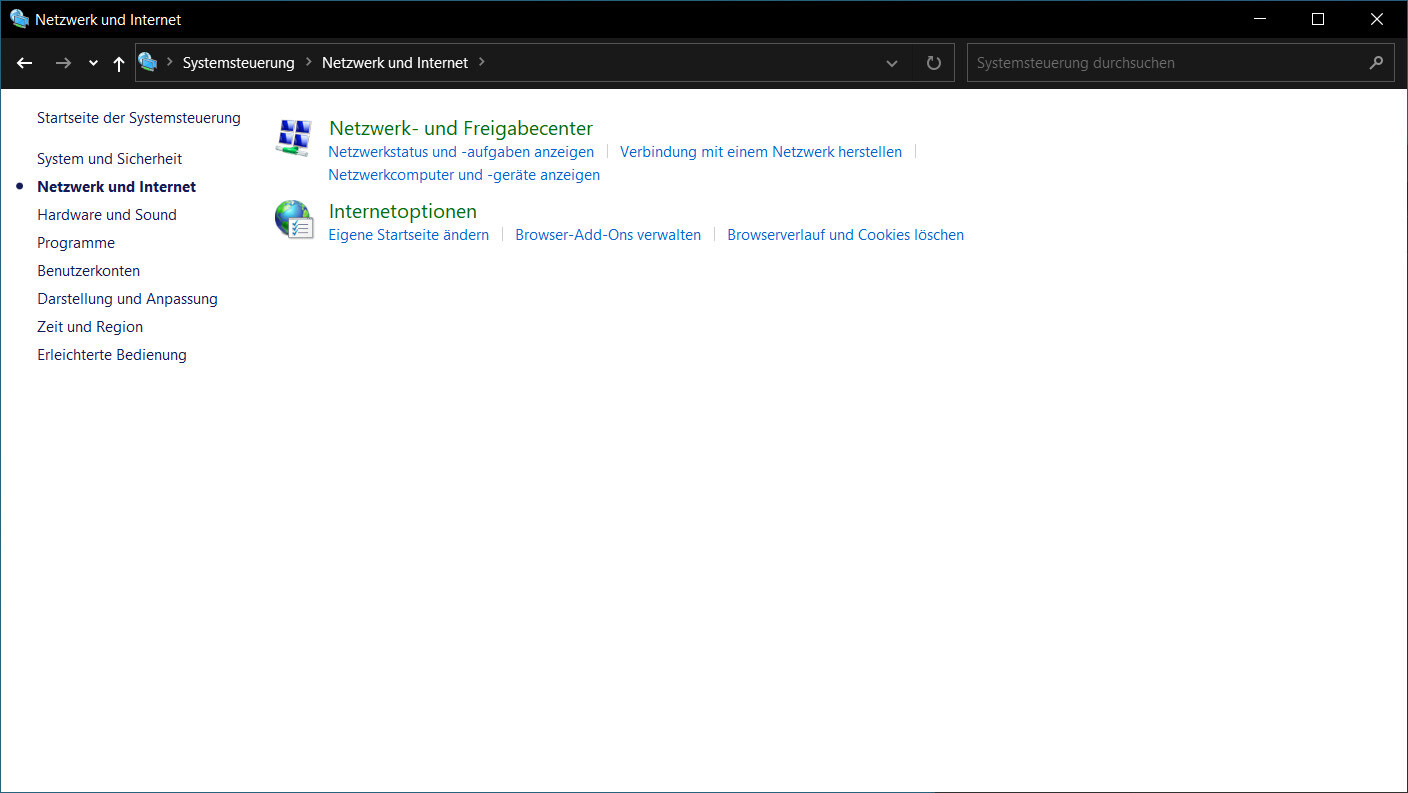
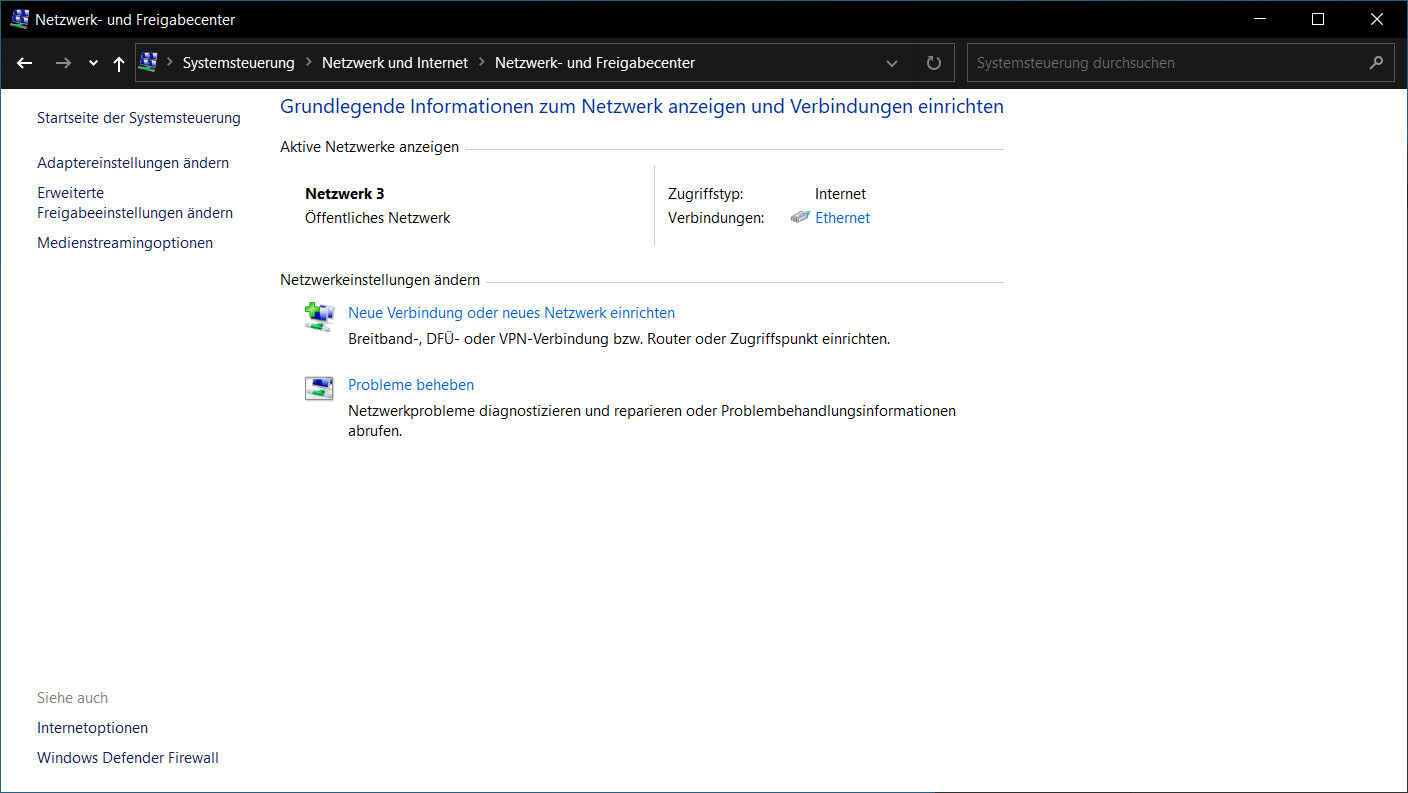
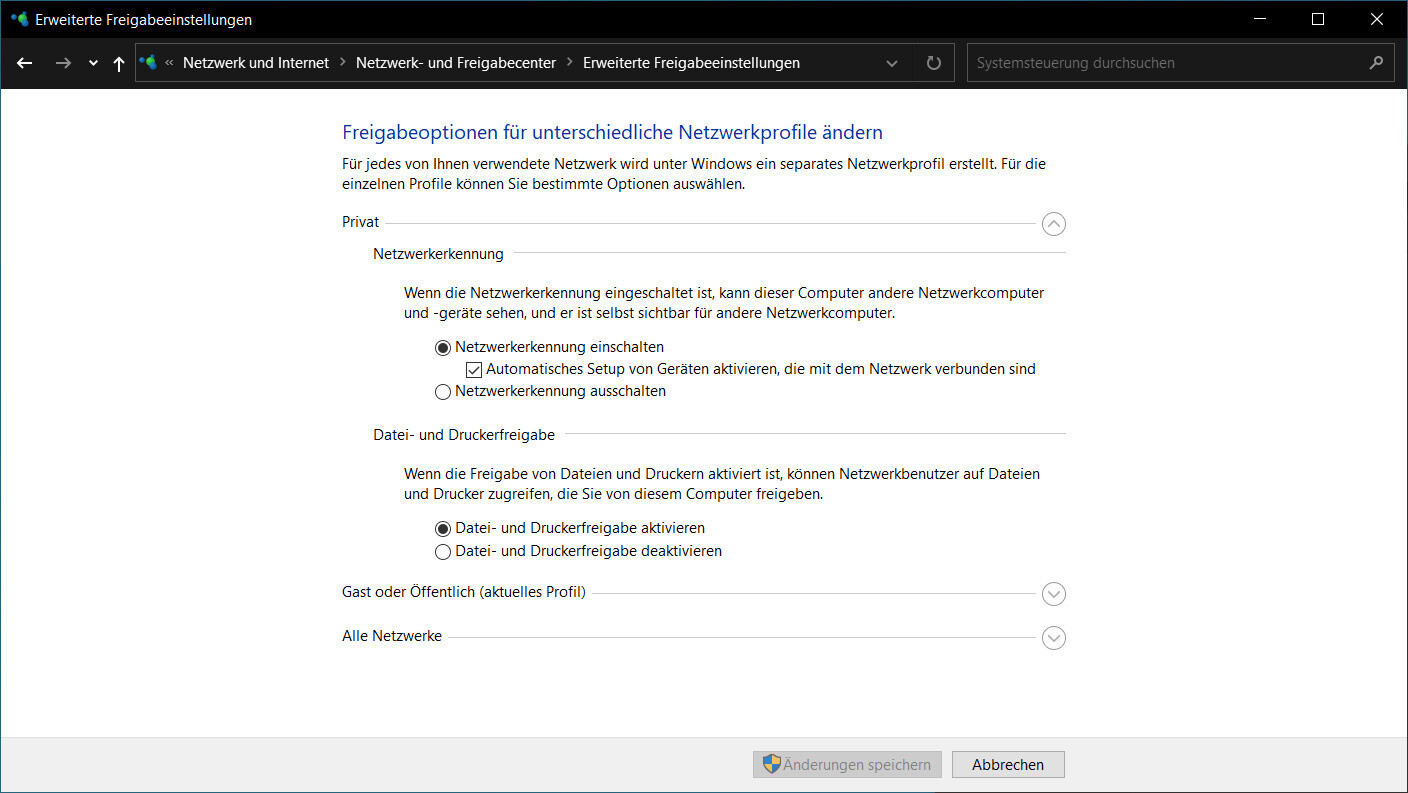
First and foremost, network sharing needs to be enabled for the current user in Windows. This requires accessing the Control Panel. In the Control Panel, navigate to “Network and Internet” and then select “Network and Sharing Center.” Under “Change advanced sharing settings,” the file and printer sharing for private network profiles must be enabled. If you wish to share files in public networks as well, this setting should also be enabled for “Guest or Public” networks.
Disable Password-Protected Sharing (optional)
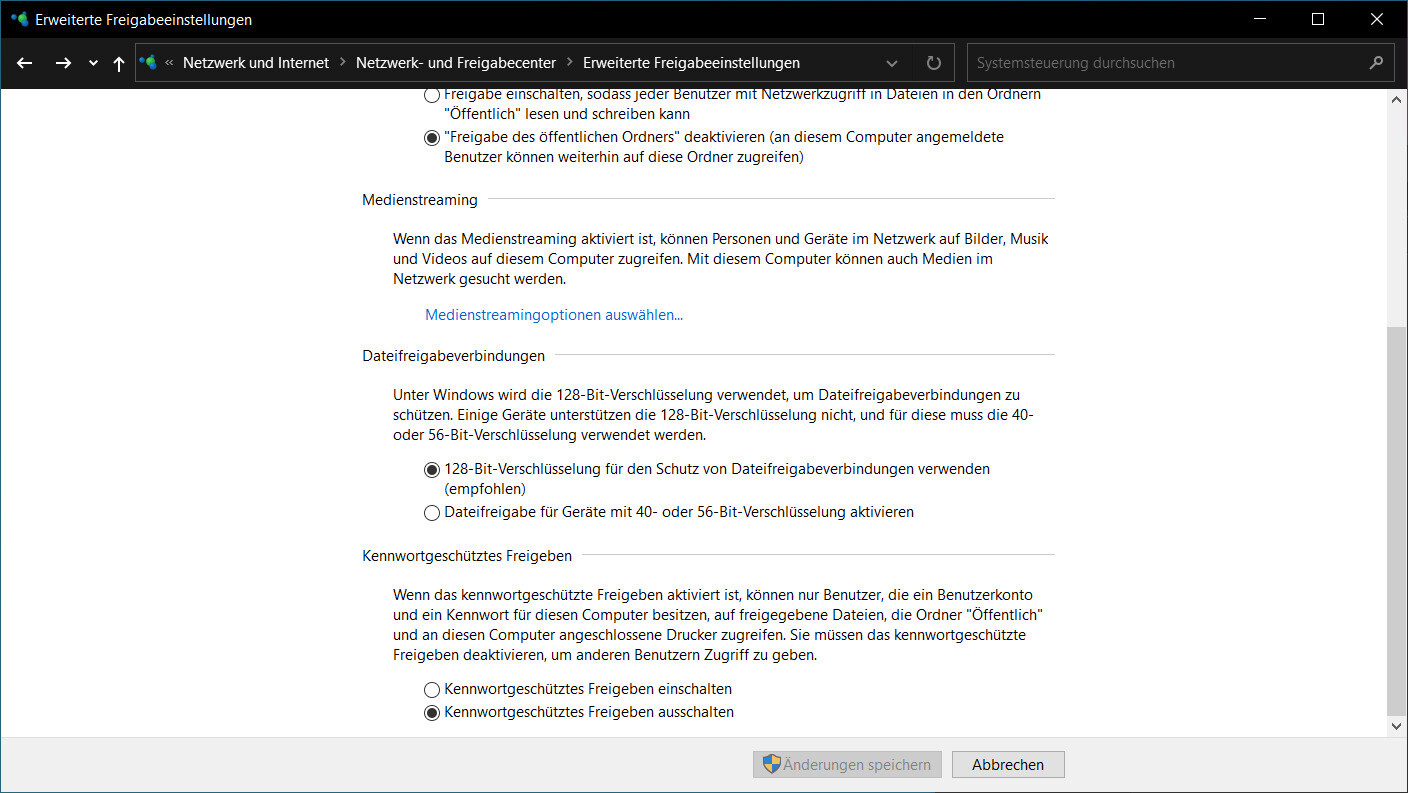
Optionally, you can also disable password-protected sharing for all networks. This means that no login credentials will be required when connecting to drives, or you can connect as a guest to the network drive.
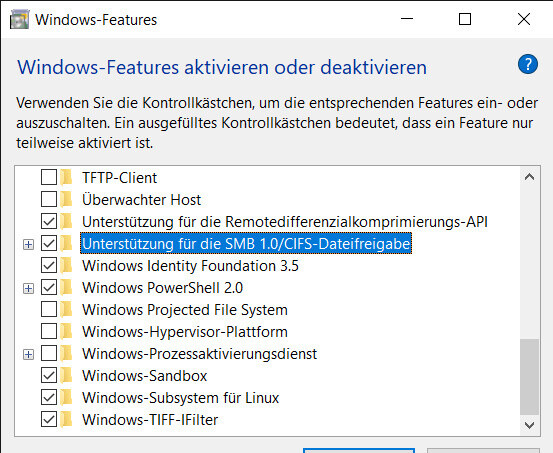
Install SMB1 Support (optional)
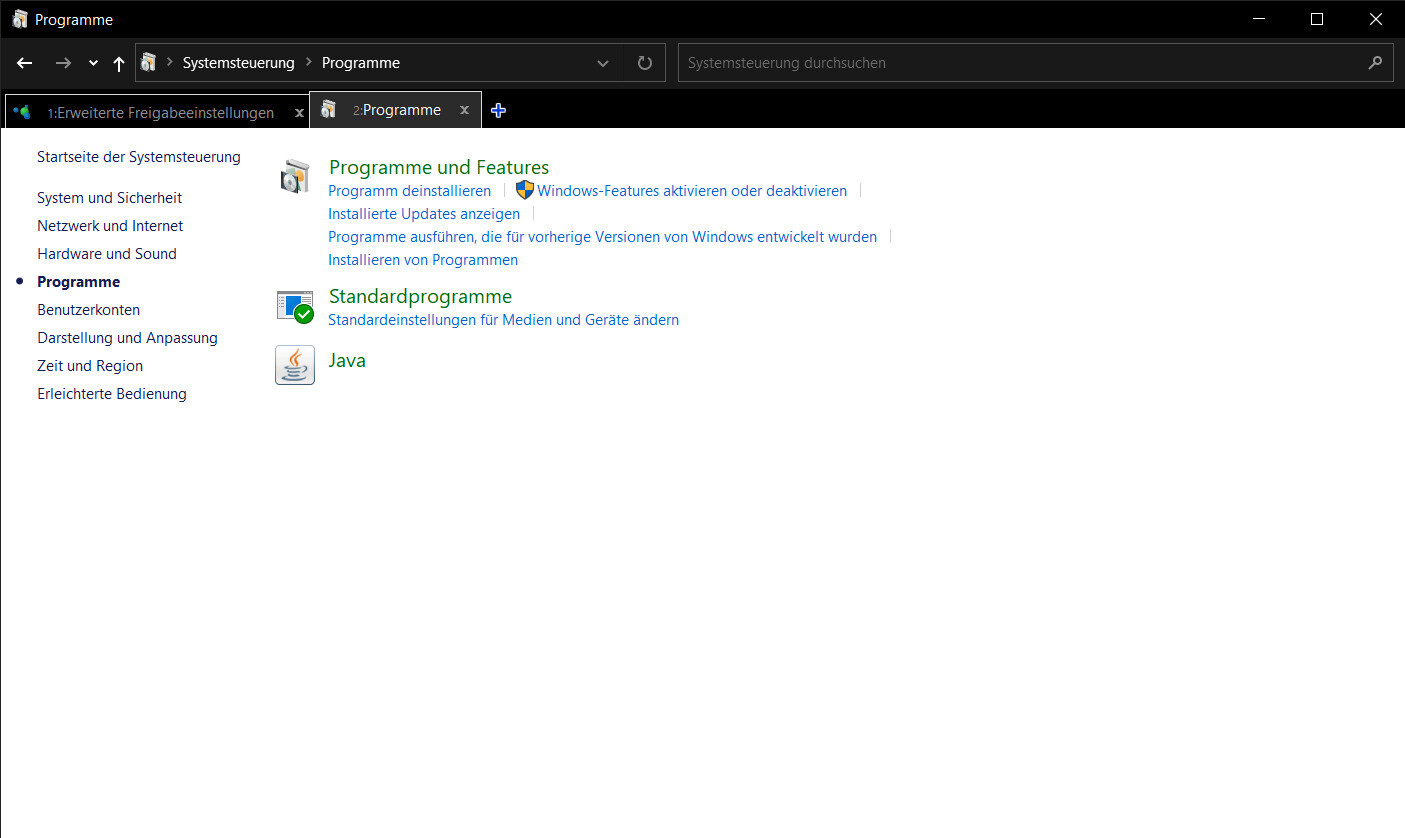
Optionally, you can now install SMB1 support for older SMB or network shares through the Control Panel and Windows Features.
To do this, open the Control Panel and go to “Programs” and then select “Turn Windows features on or off.” Enable “SMB 1.0/CIFS File Sharing Support” and install it through Windows Updates.
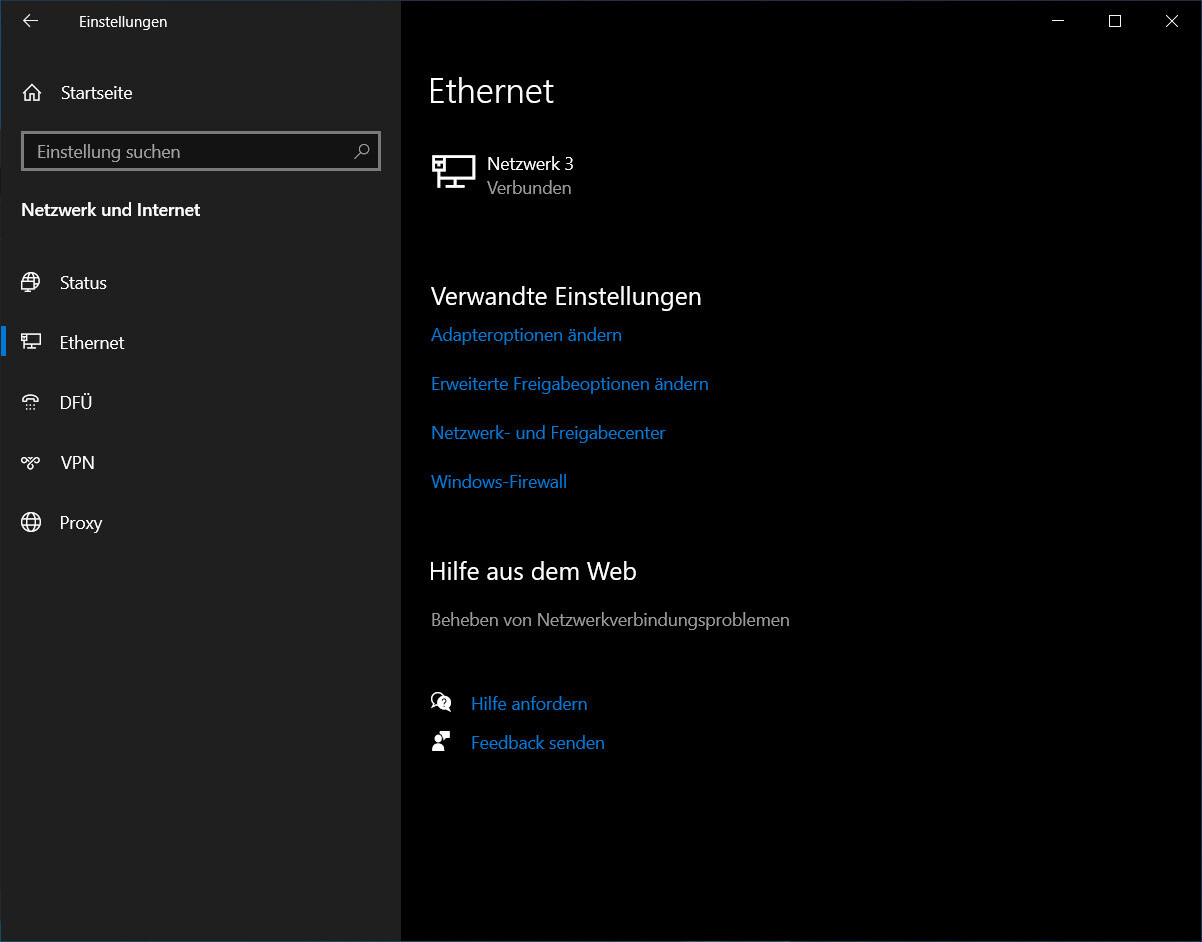
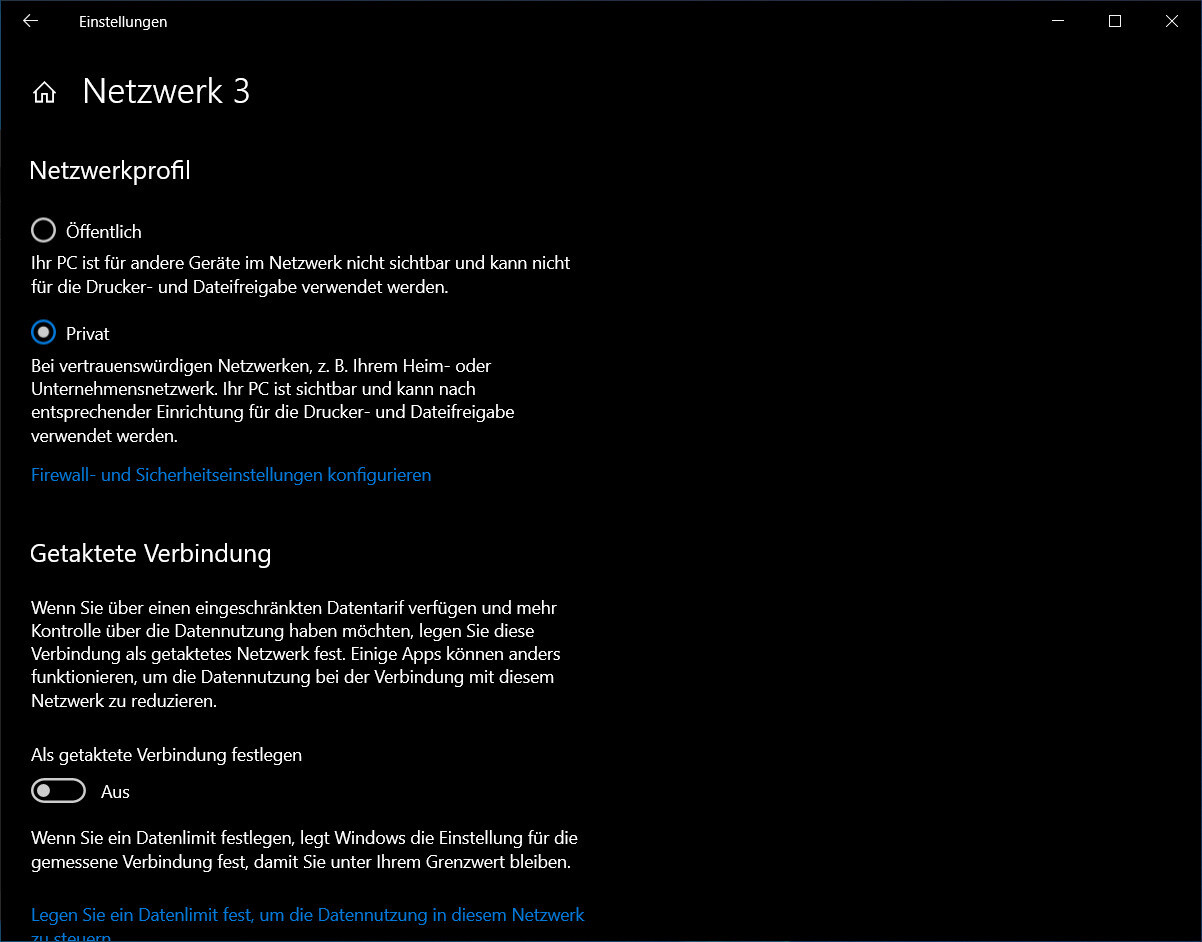
Adjusting Windows 10 Network Profile (optional)
If you are at home or on the go, connected to a trusted network, you can change the network profile to Private if you haven’t done so already. To change the network profile, open the Windows Settings and navigate to the “Network & Internet” menu. In the “Network & Internet” menu, select the connected network or network adapter. If you are connected via an Ethernet cable, click on “Ethernet” and then on the connected network. From there, change the network profile from “Public” to “Private”.

Share Folders over Network in Windows 10
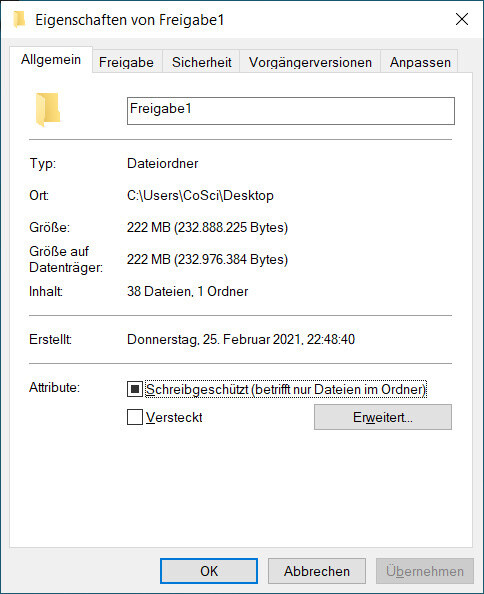
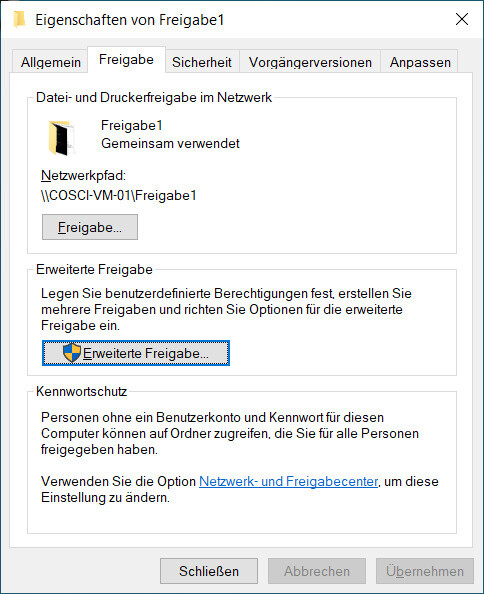
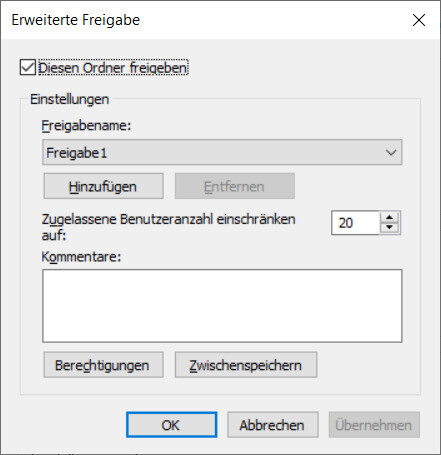
To share one or more folders over the network, open the “Properties” of the folder you want to share and switch to the “Sharing” tab. Under “Sharing,” use “Advanced Sharing” to share the respective folders and optionally assign them a different name.
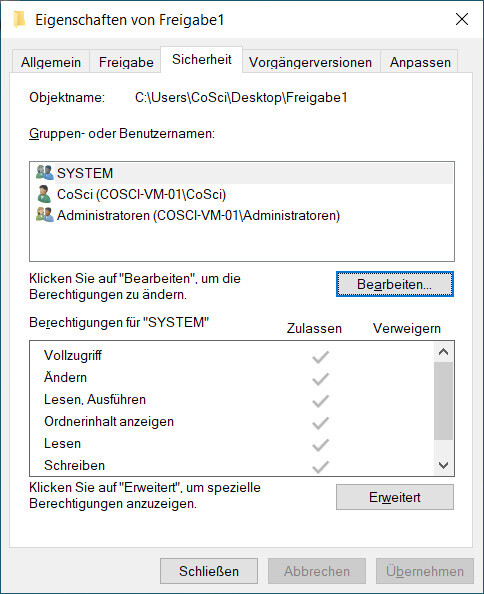
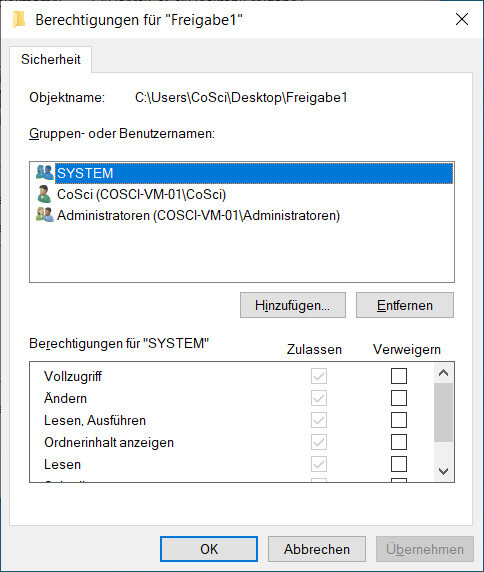
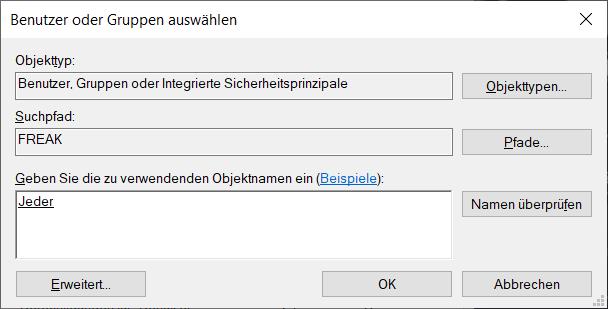
To allow access to the shared folders without a user account, i.e., as a guest, you need to edit the “Security” tab. Add the user “Everyone” and assign them read permissions.
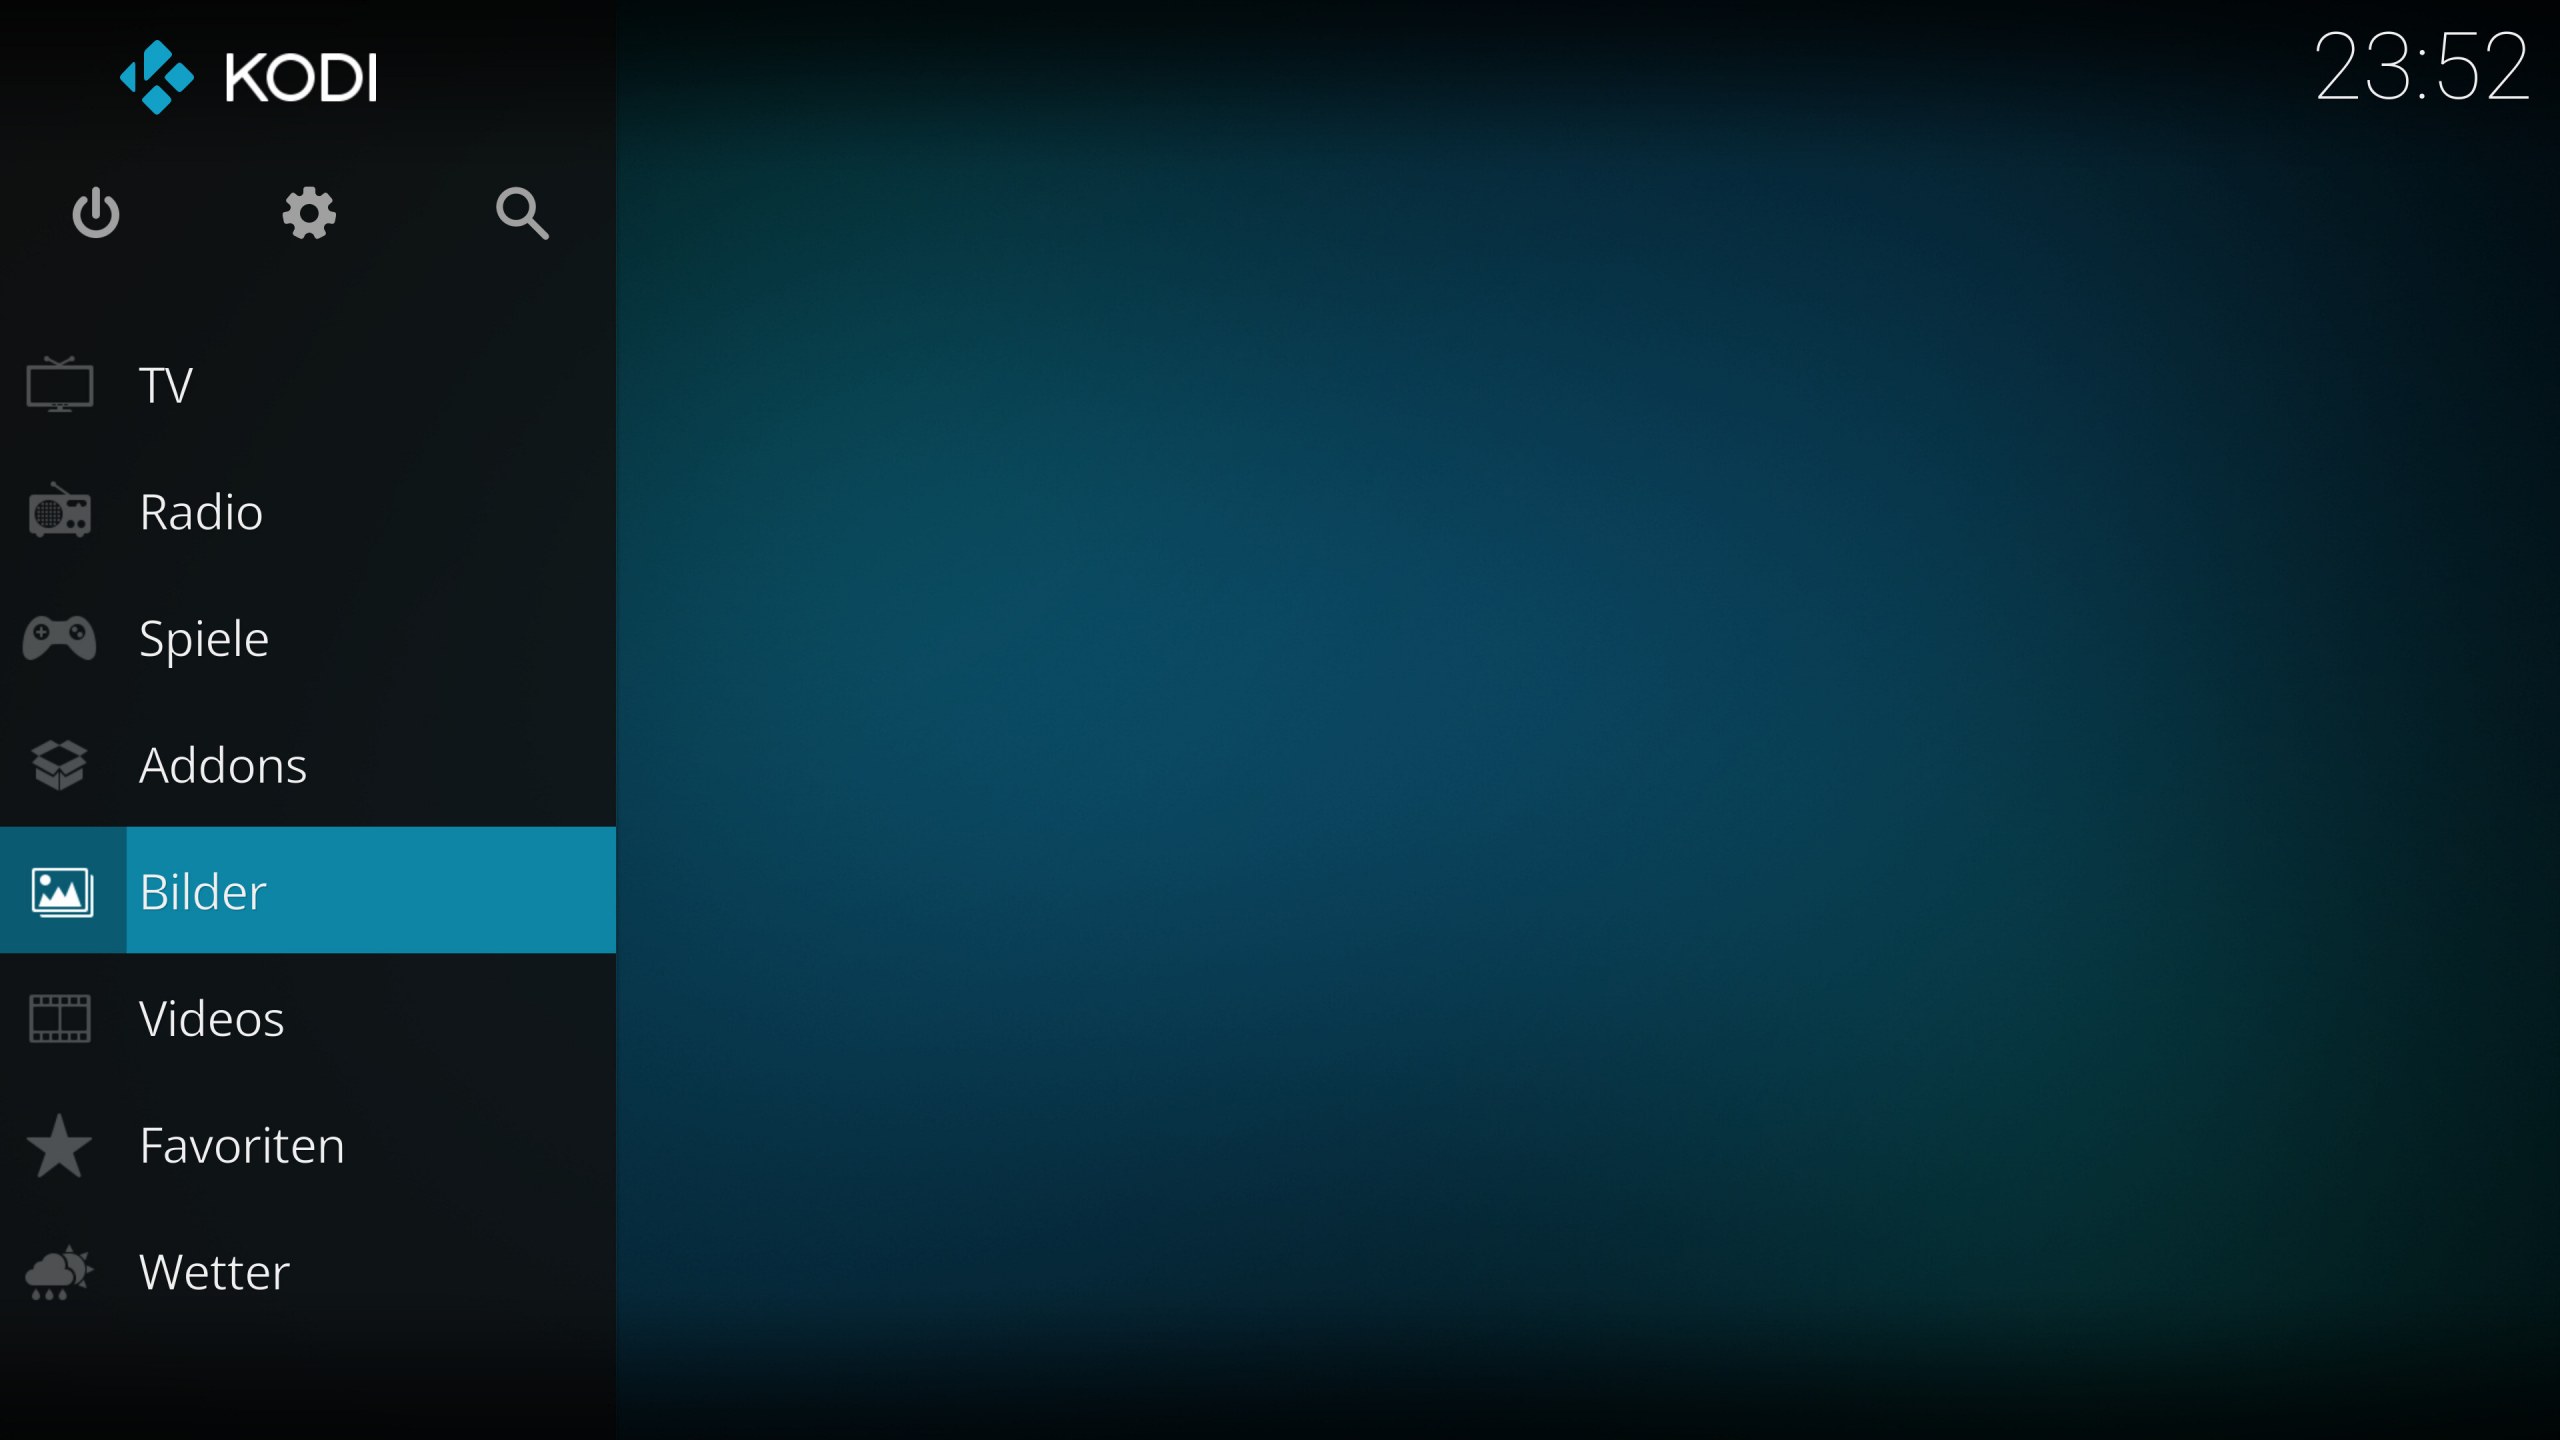
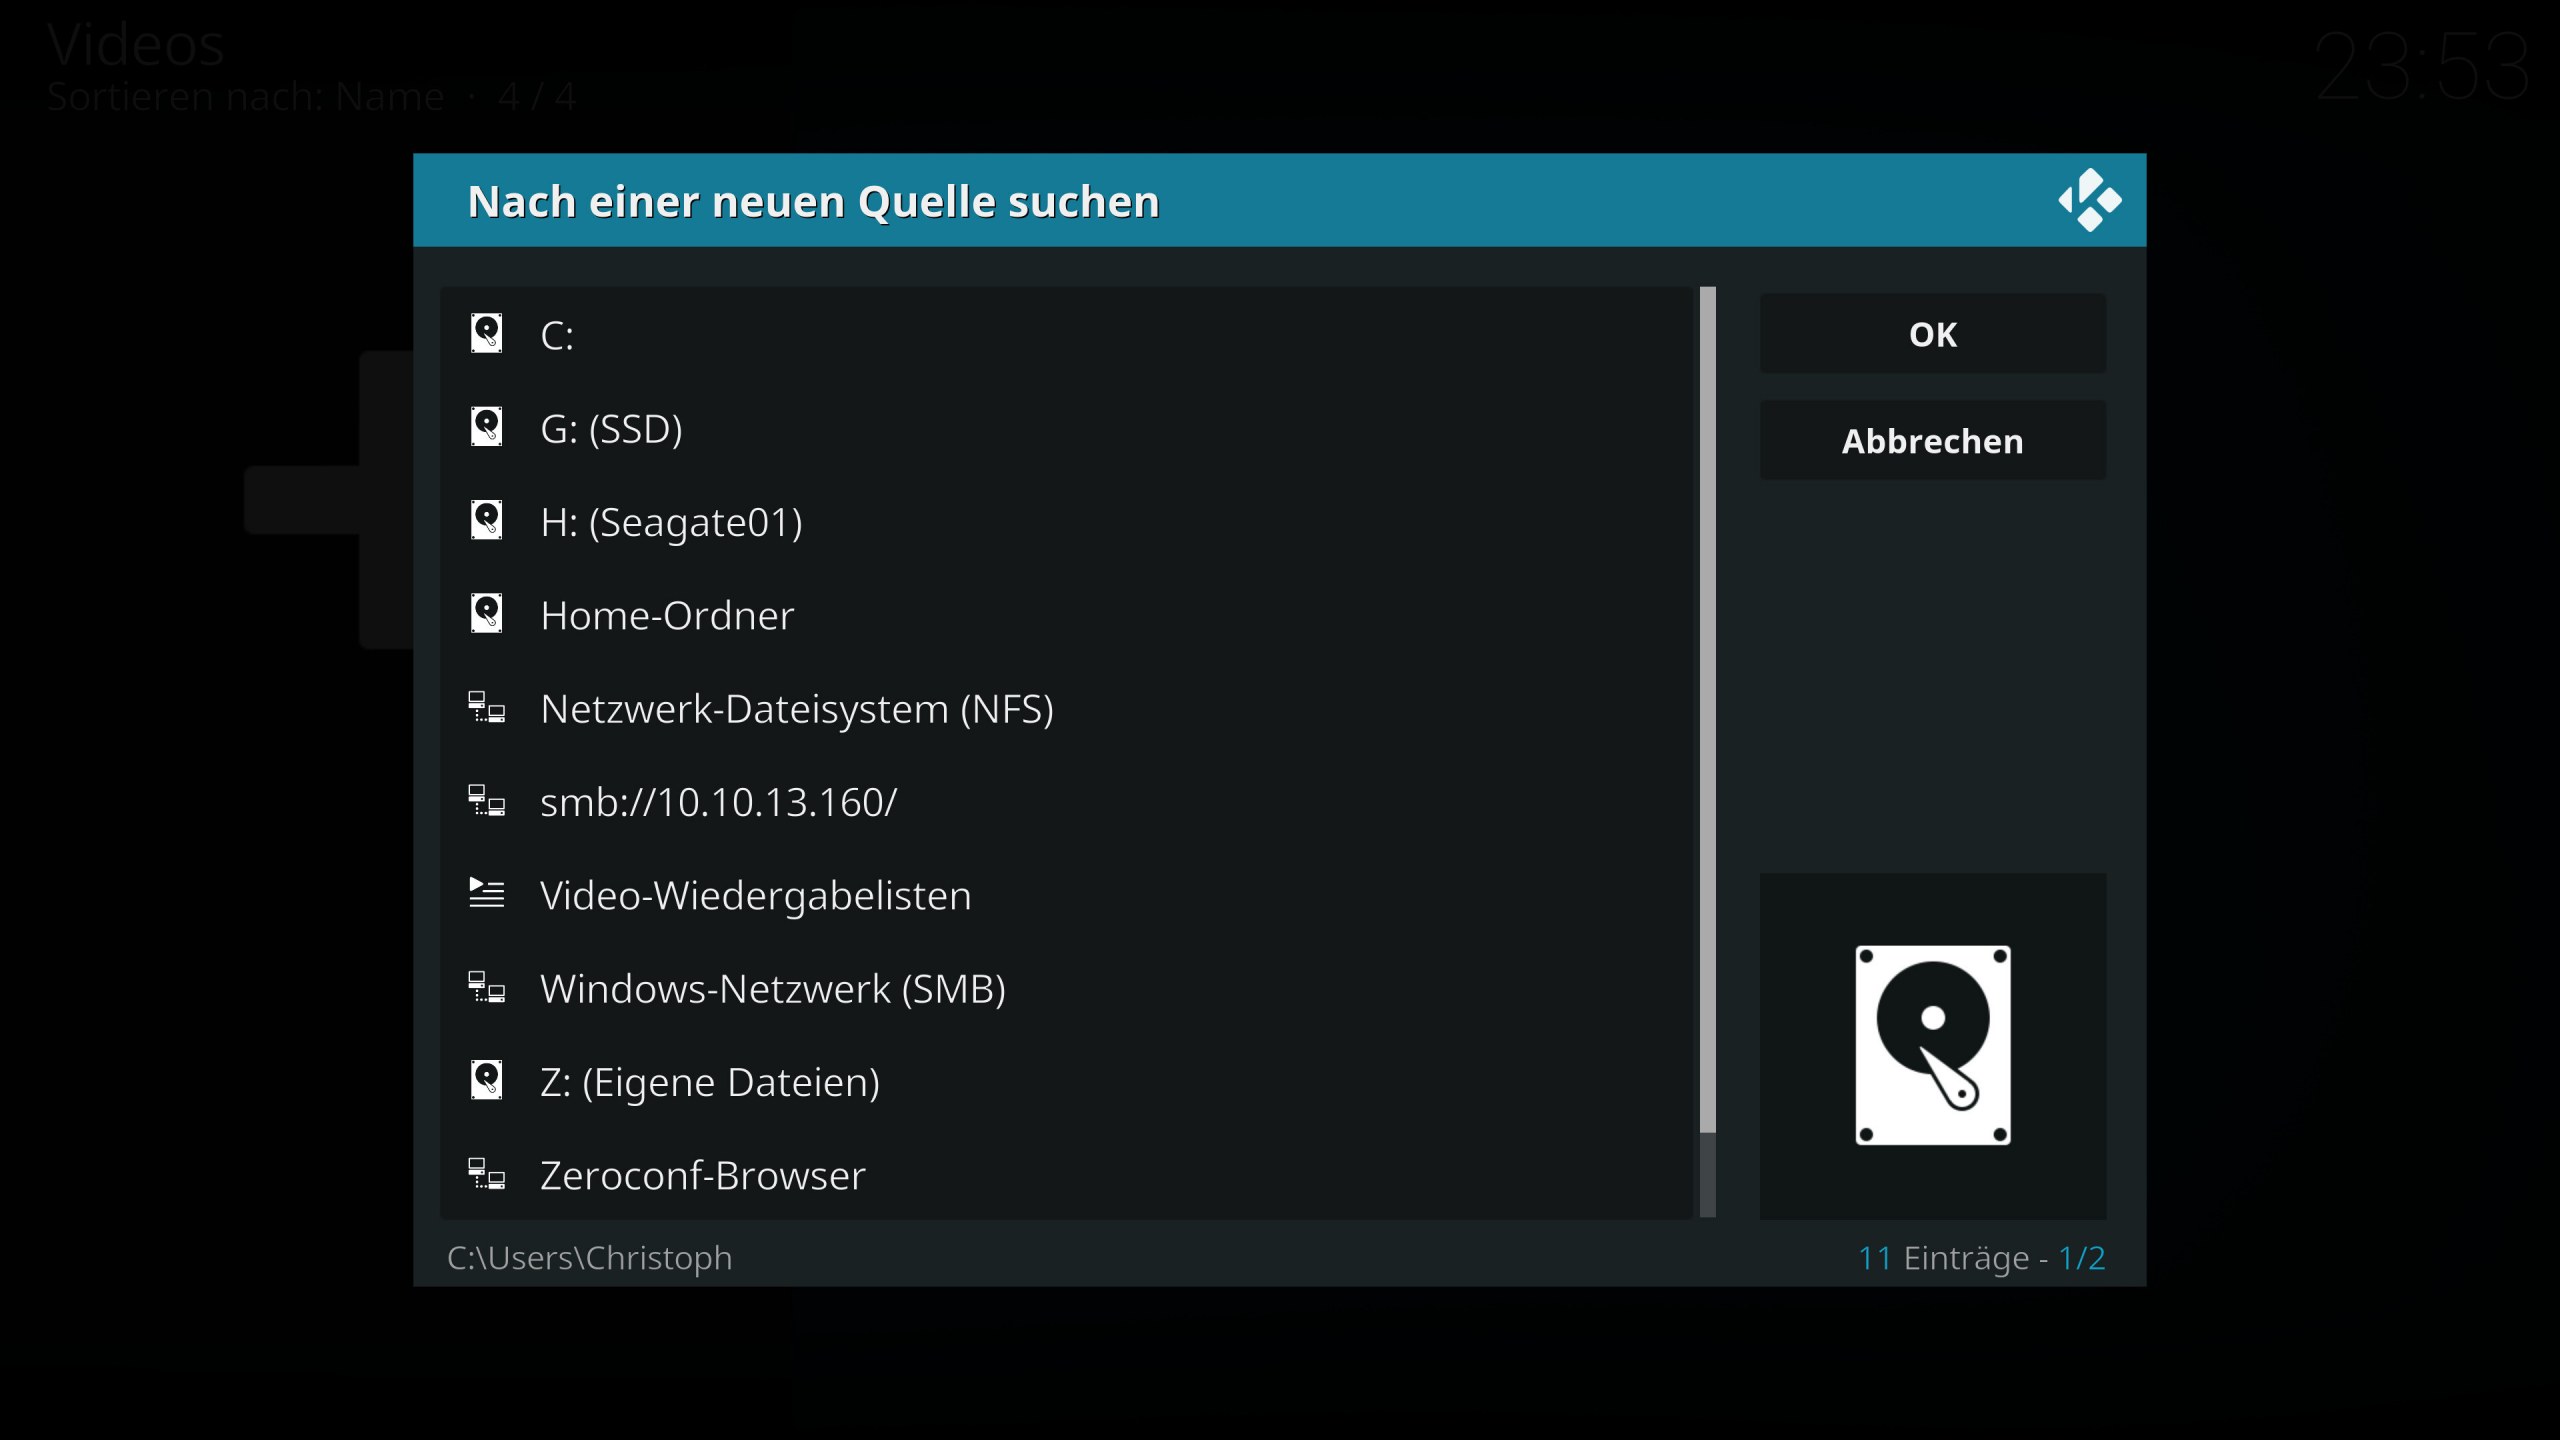
Adding Kodi Network Share
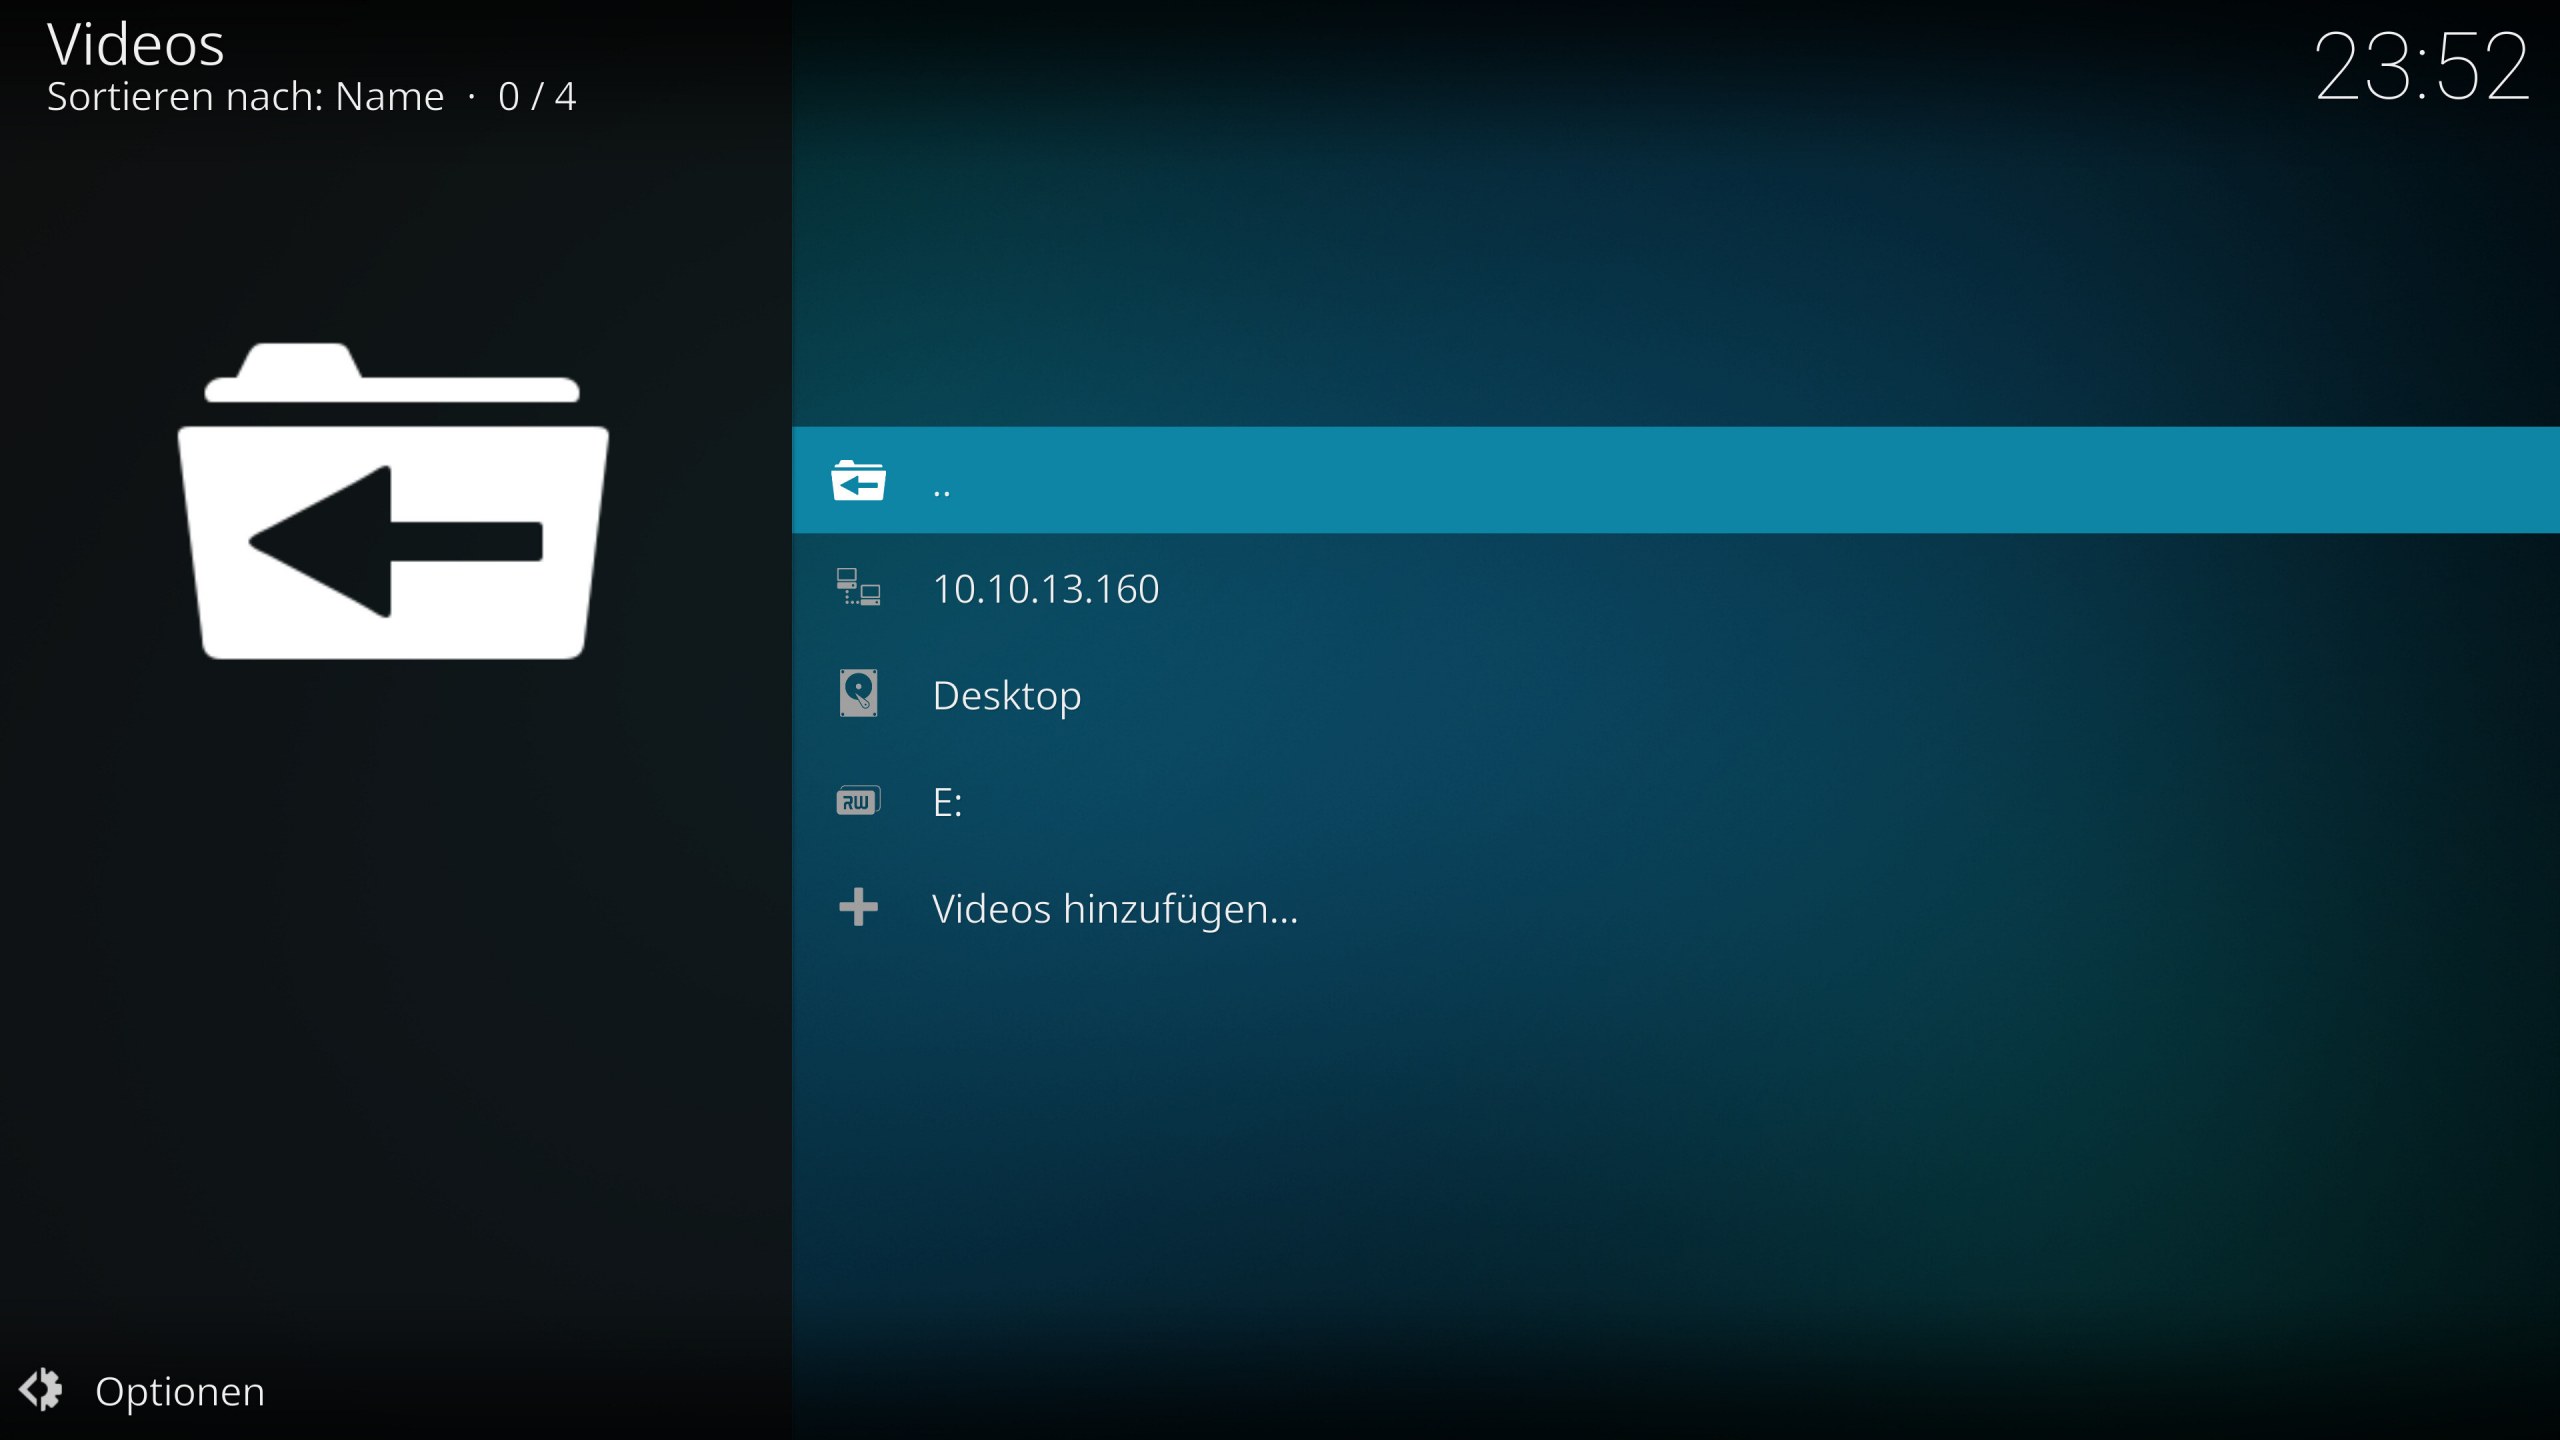
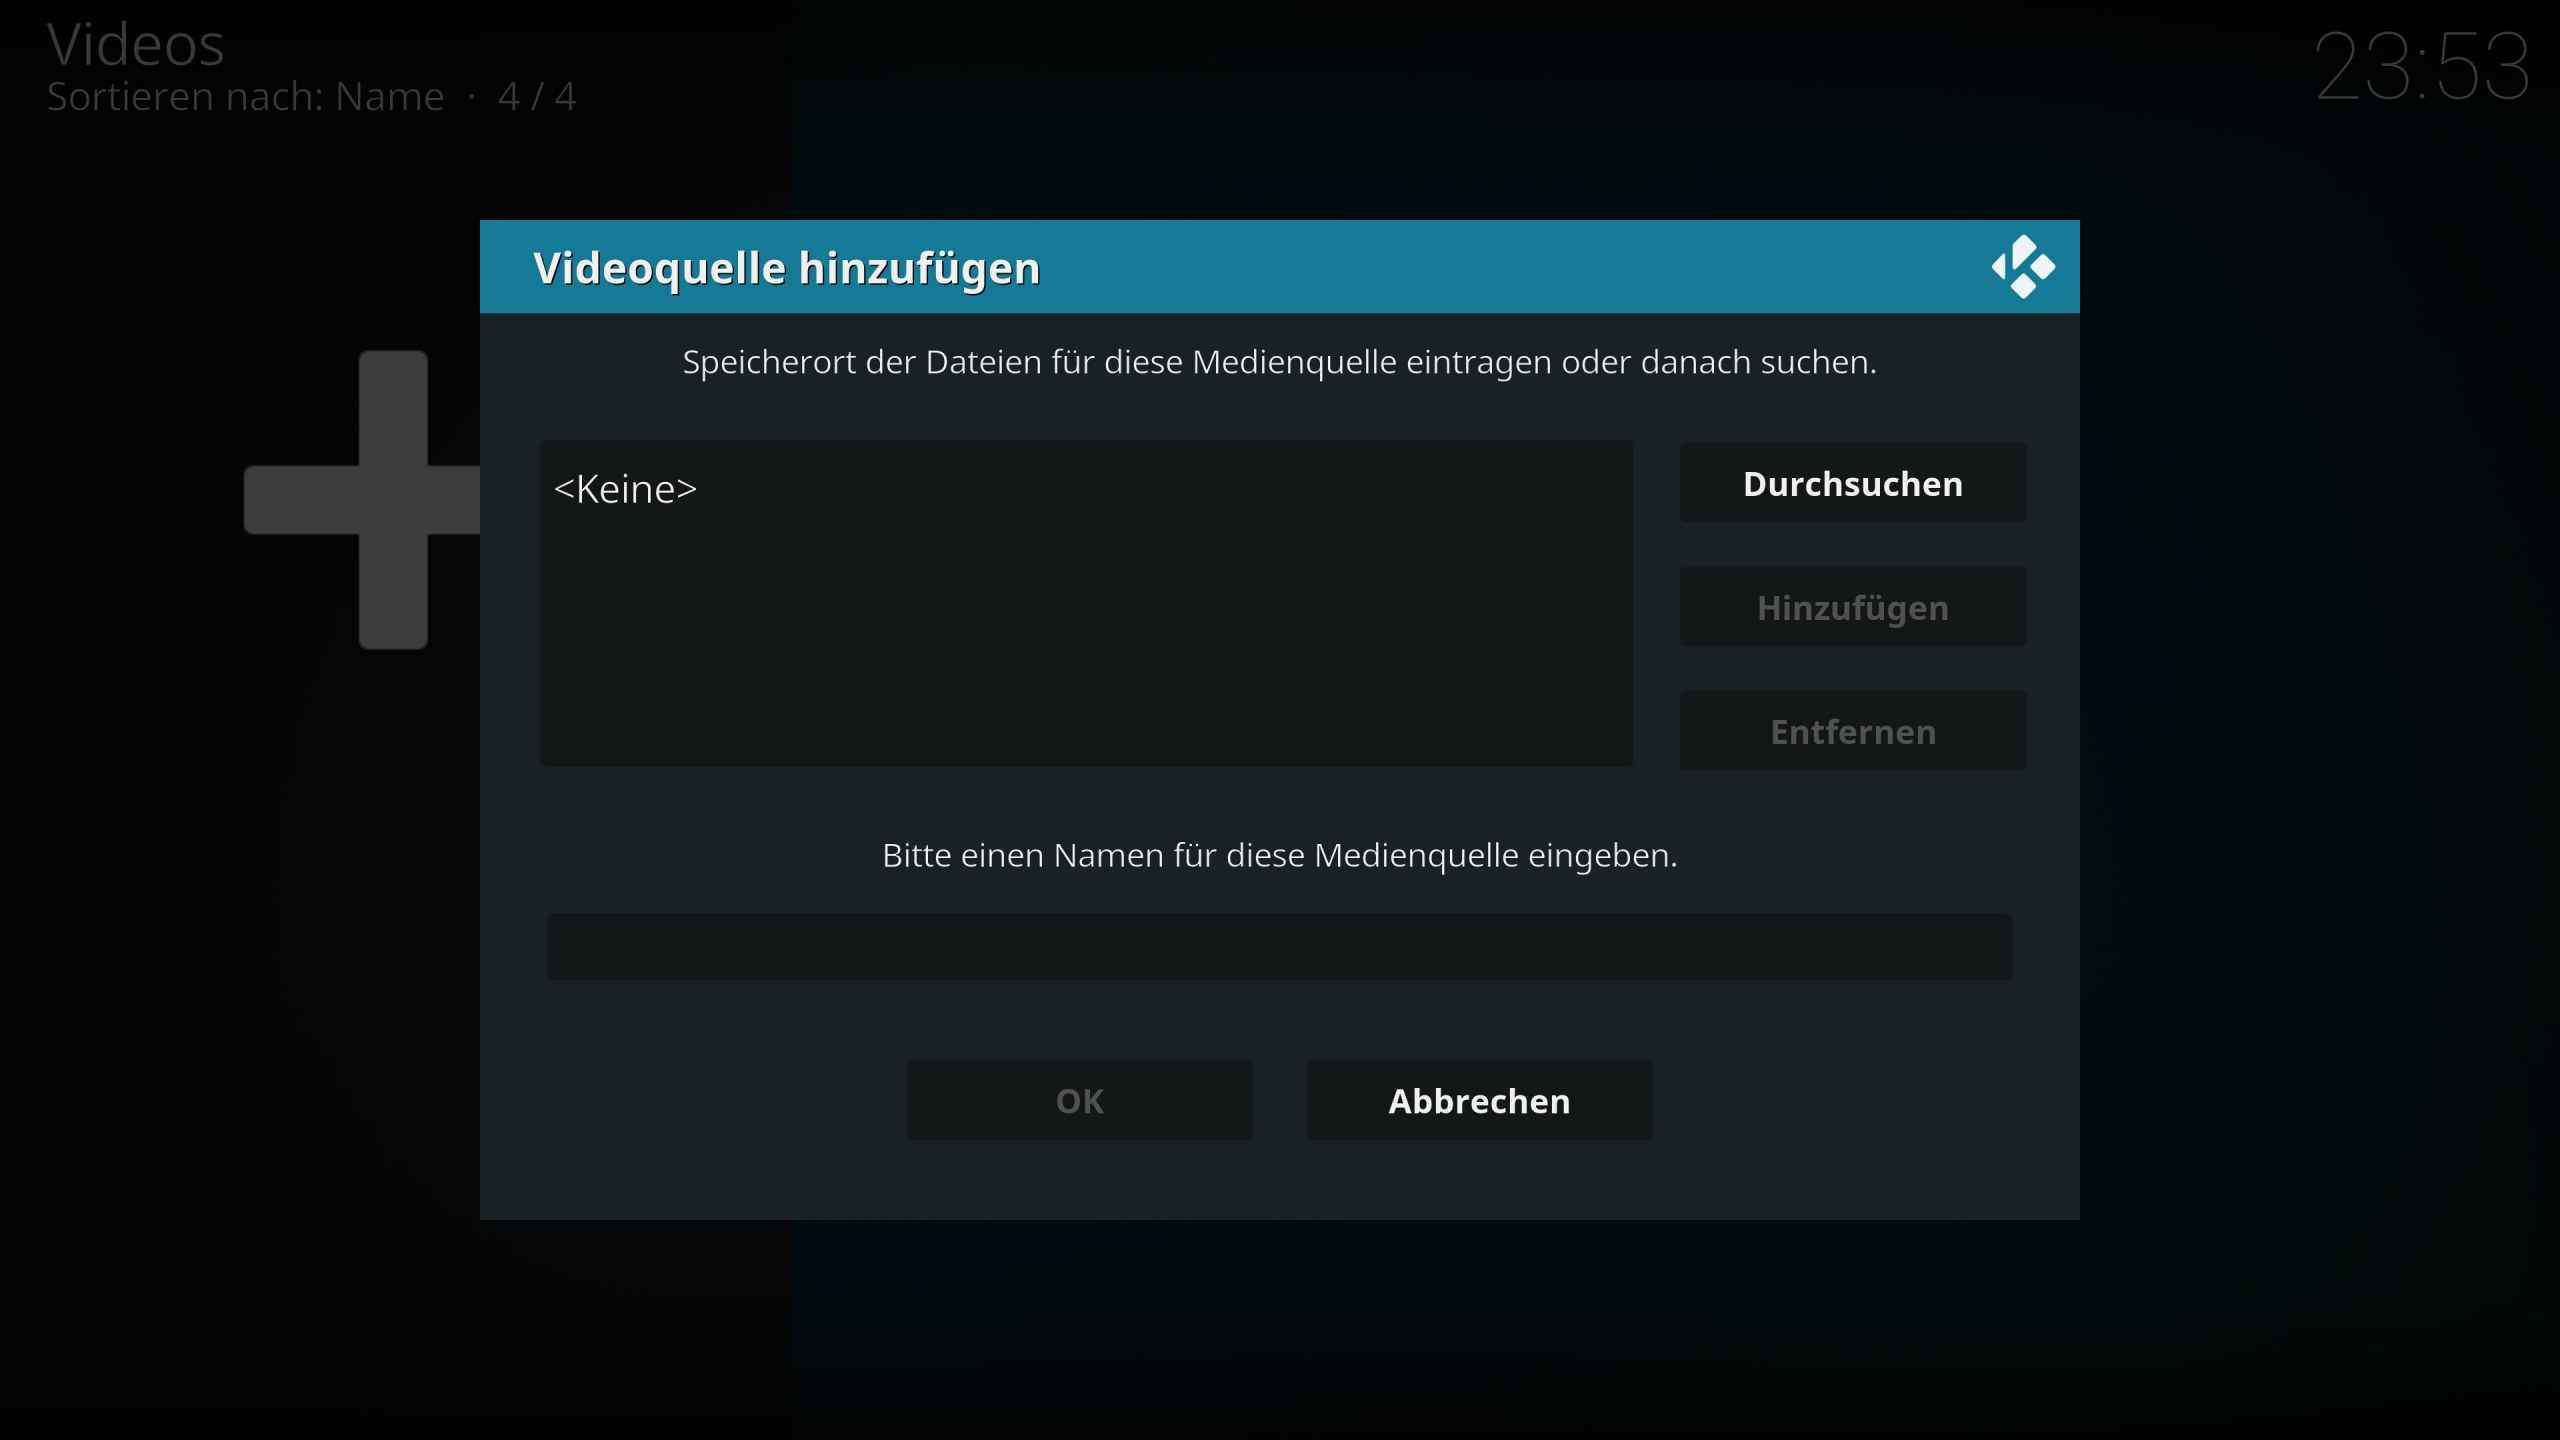
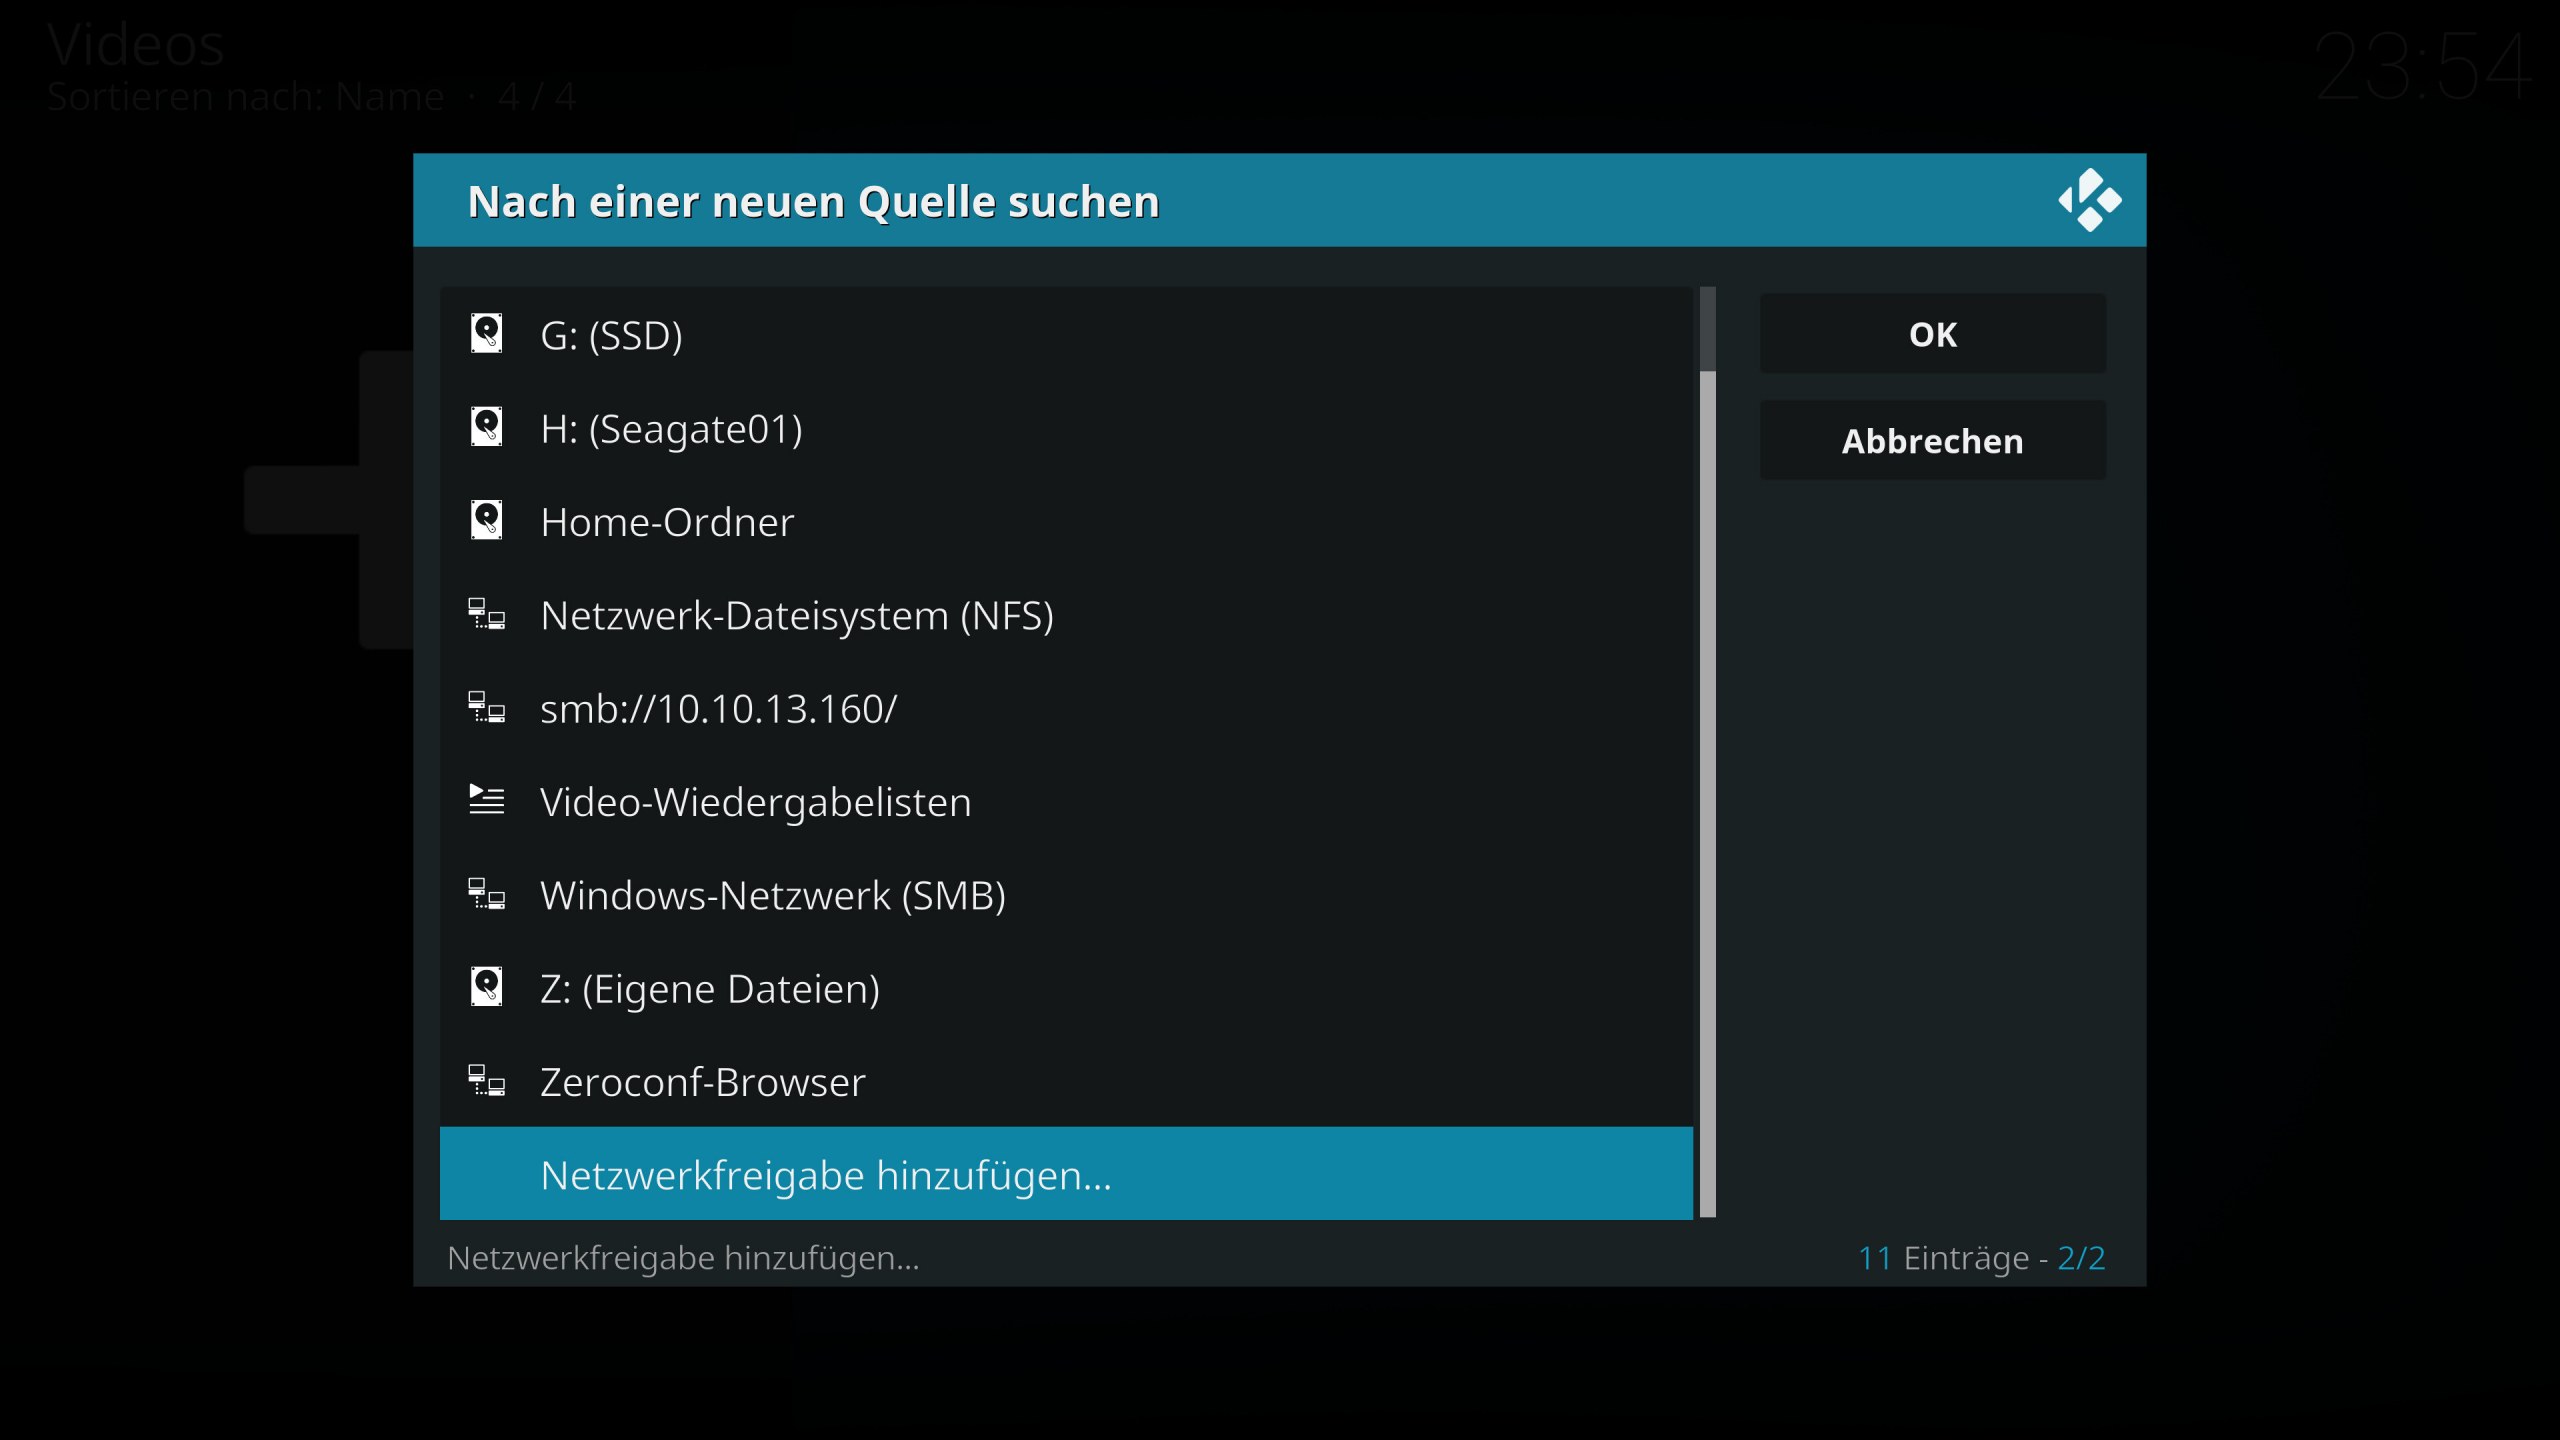
Once the network share has been set up in Windows, the shared folders just need to be added to Kodi. To do this, navigate to one of the respective tabs in Kodi for Pictures, Videos, Shows, TV, or similar, and select “Add Source” or “Add Files” option. Under the “Add Source” menu, you can add either a network location or local storage. Network drives can be added by selecting “Windows Network (SMB)” to search and add them automatically, or alternatively, you can manually add them using “Add Network Location.”
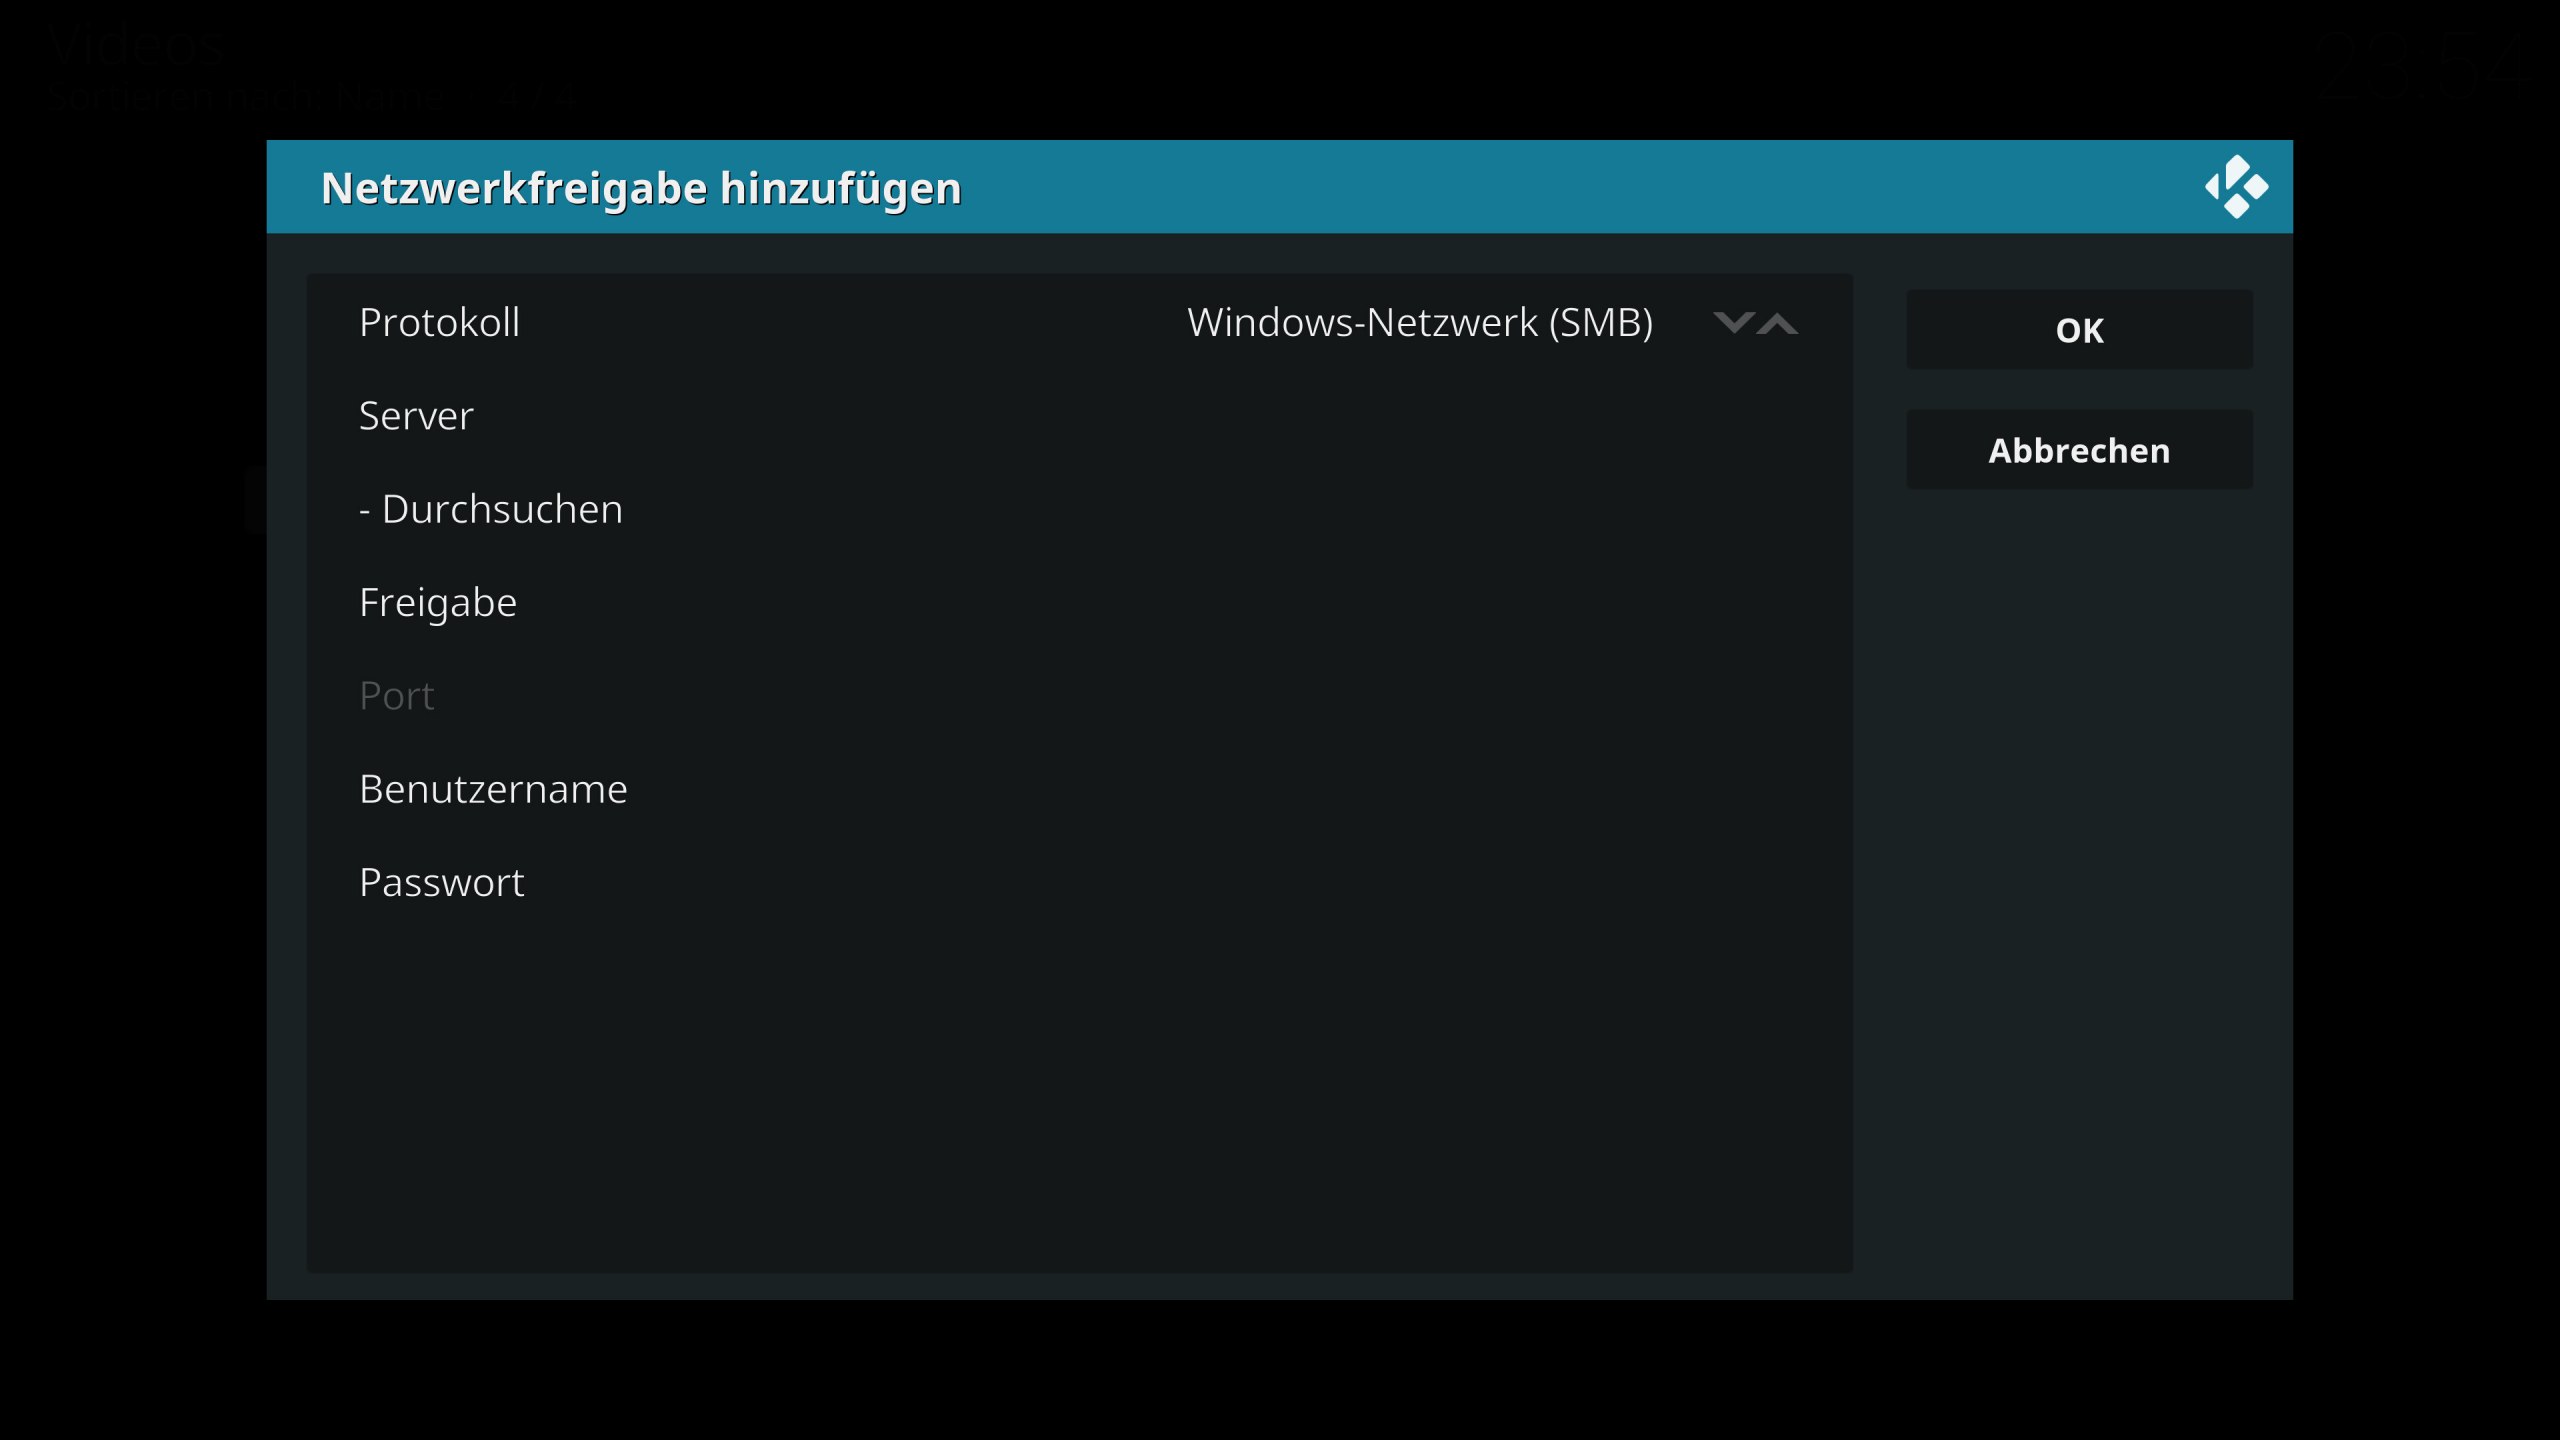
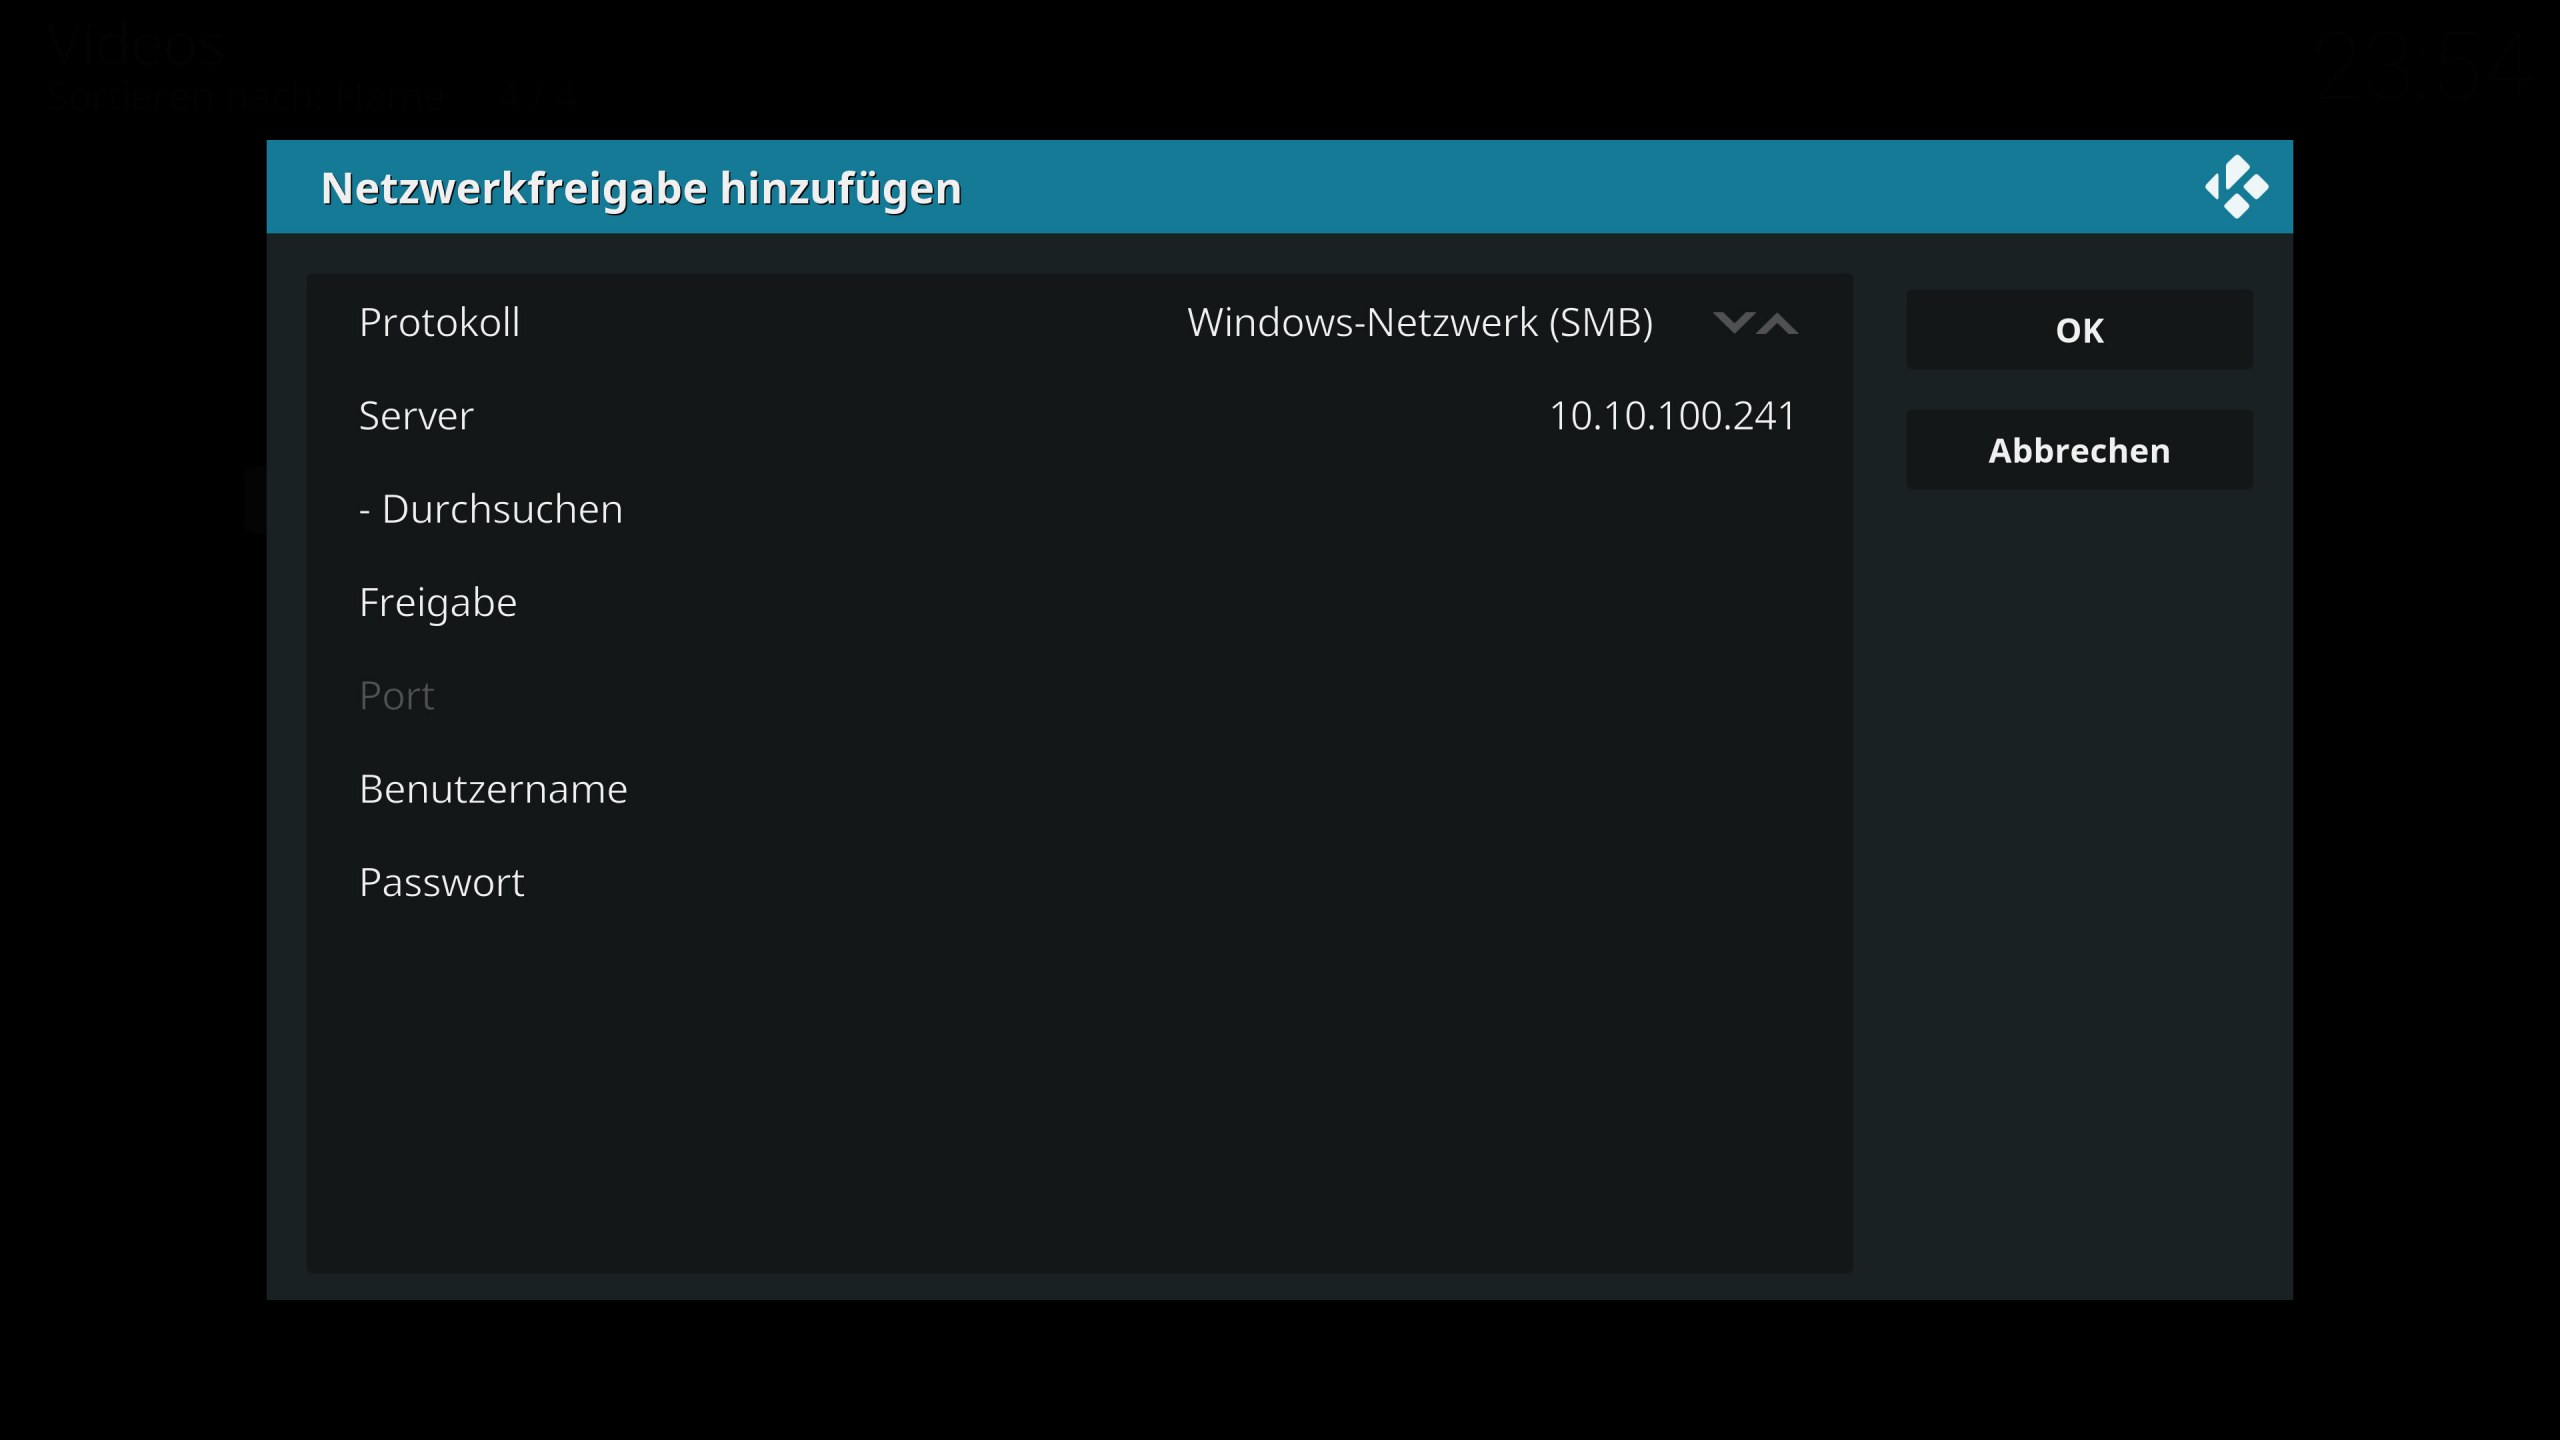
When using “Add Network Location,” select “Windows Network (SMB)” as the protocol, and enter the IP address or the name of the computer you want to connect to as the server.
Once the source has been added, it can be accessed and used within Kodi.
Addendum
Error – Operation not permitted
If errors occur while adding the network share in Kodi and the error message “Operation not permitted” appears, the issue can potentially be resolved by forcing the SMBv1 protocol, setting the minimum and maximum versions, and enabling the “Use legacy security” option. These settings can be found under Settings => Services => Enable Expert Mode => SMB Client.
TL:DR
Enable network sharing
Control Panel => Network and Internet => Network and Sharing Center => Change advanced sharing settings
Private => Turn on file and printer sharing
Optional, if accessing the network share without a username and password
All Networks => Turn off password-protected sharing
Optional – Install SMB1
Control Panel => Programs => Turn Windows features on or off => Enable/install support for SMB 1.0/CIFS file sharing
Share folders over the network
Right-click => Properties => Sharing => Enable advanced sharing
Security => “Edit…” => Add => Username “Everyone”
Add Kodi video source
Kodi => Videos/Pictures/TV Shows => Add => Browse => Add network source => Enter IP address/Server name