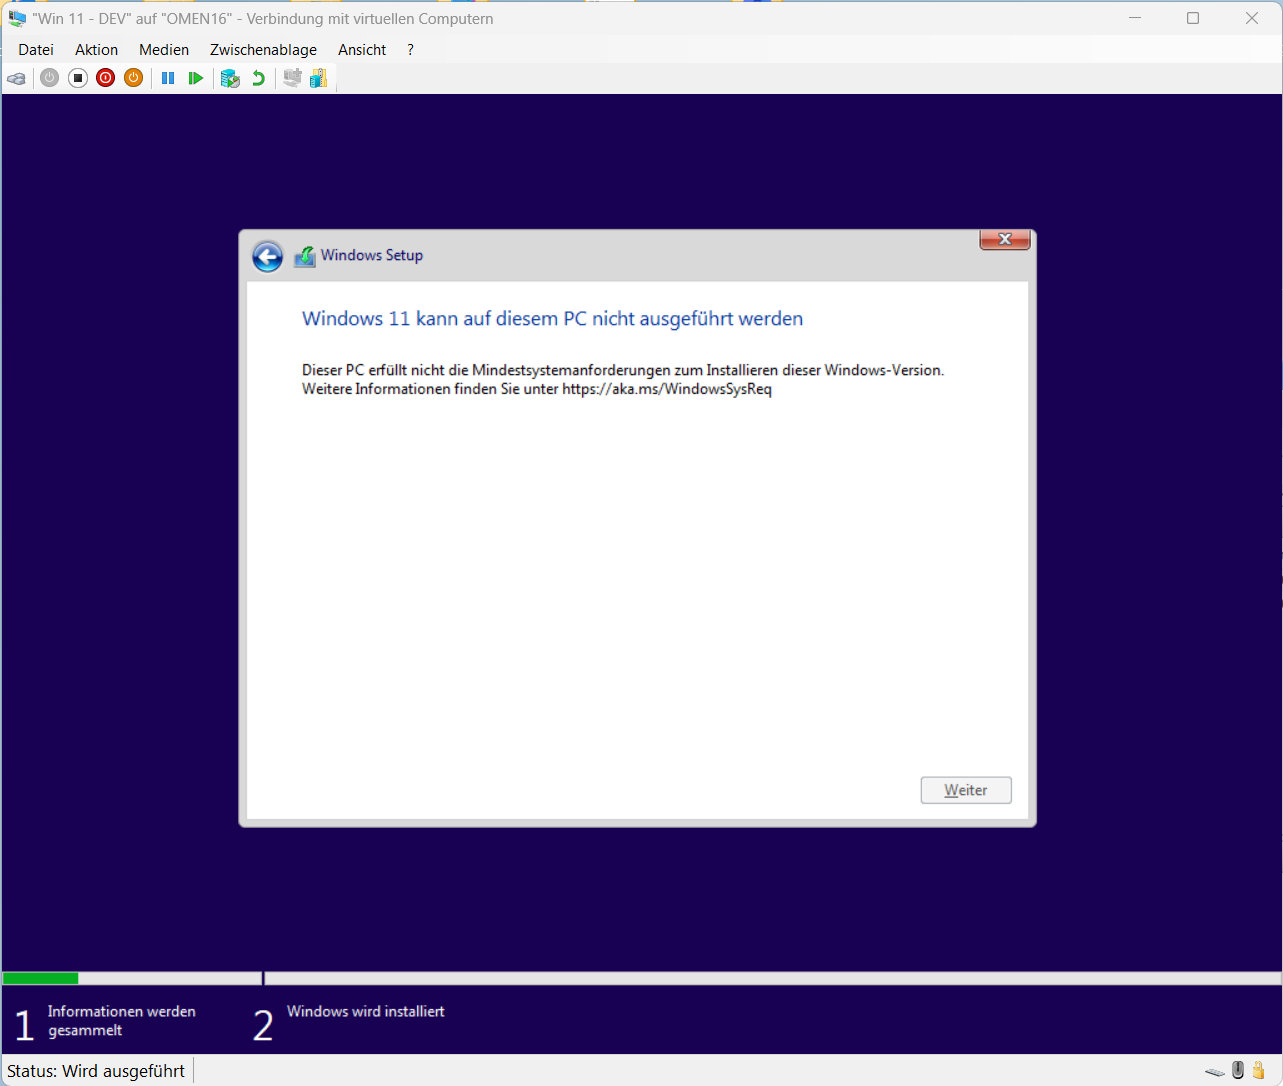
When Microsoft Released Windows 11 they also raised the bar to install it. While the system requirements for Windows 7, 8 and 10 weren’t that high, for Windows 11 you not only need a faster CPU and more RAM, you also need UEFI for Secure Boot and a CPU that supports TPM 2.0. If your Mainboard supports it, you could also install a TPM Module but the easier way is to bypass it while installing Windows 11 or to create a bootable USB Stick with Rufus which removes the checks.
- CPU: 1GHz, 2 Cores
- RAM: 4GB
- Disk space: 64GB
- Firmware: UEFI with Secure Boot
- Trusted Platform Module: TPM 2.0
- Graphic Card: Compatible with DirectX 12
- Display Resolution: 1280x720p
- Internet Access to connect your Microsoft Account
Bypass with Registry Editor while installing
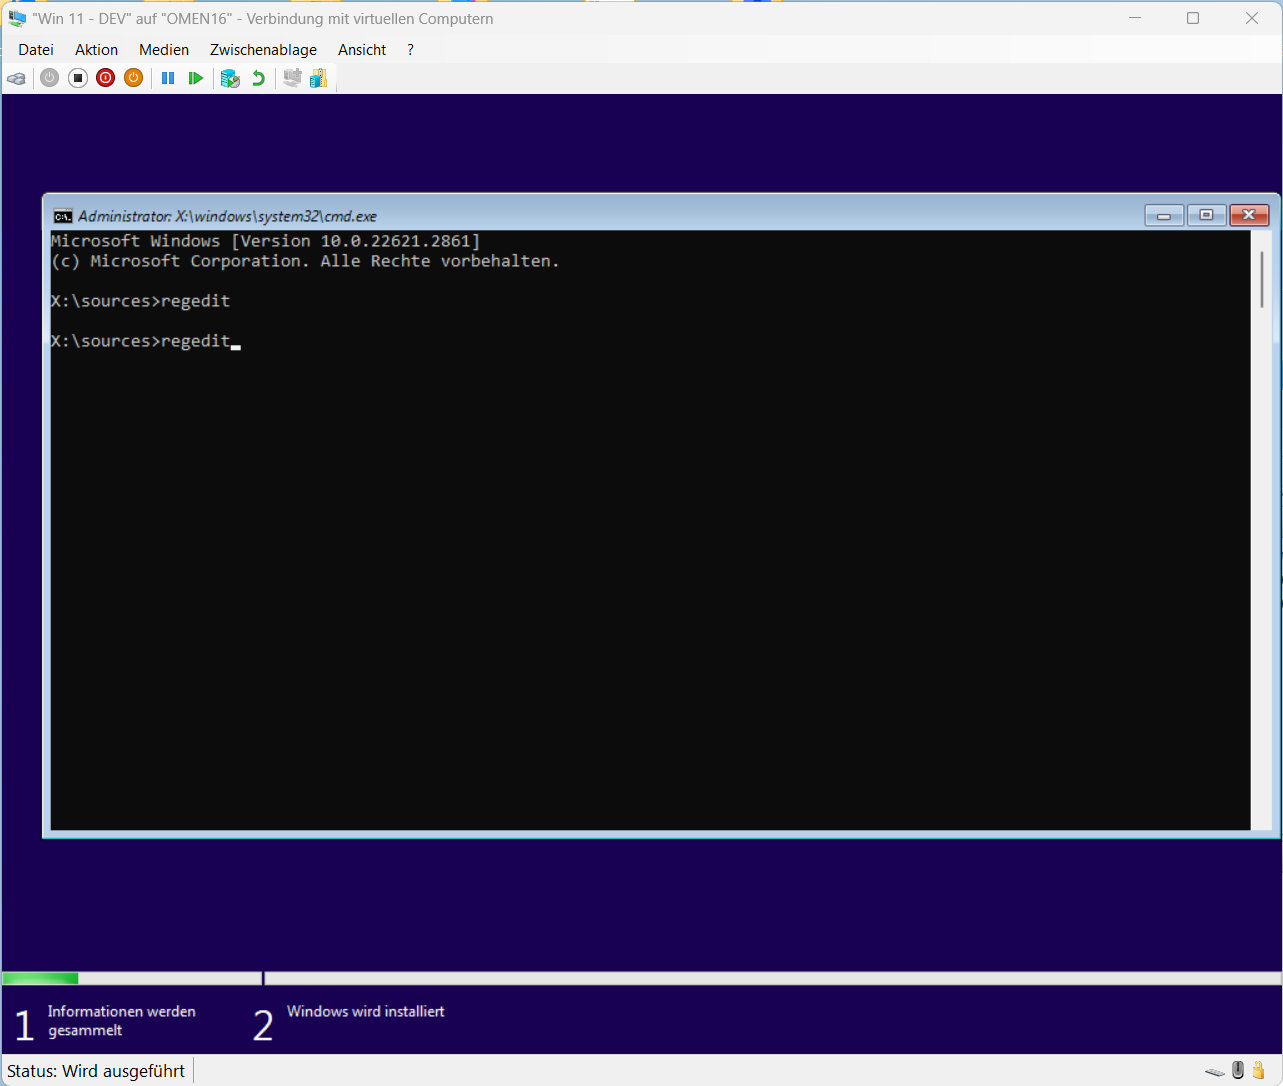
If you can’t or don’t want to modify your Windows Install Media then you can bypass the requirement checks while walking through the Setup Wizard. After booting from your USB Drive or DVD hit [SHIFT]+[F10] to open the command line tool. Inside the command line tool type “regedit” and press [Enter] to open the Registry Editor.
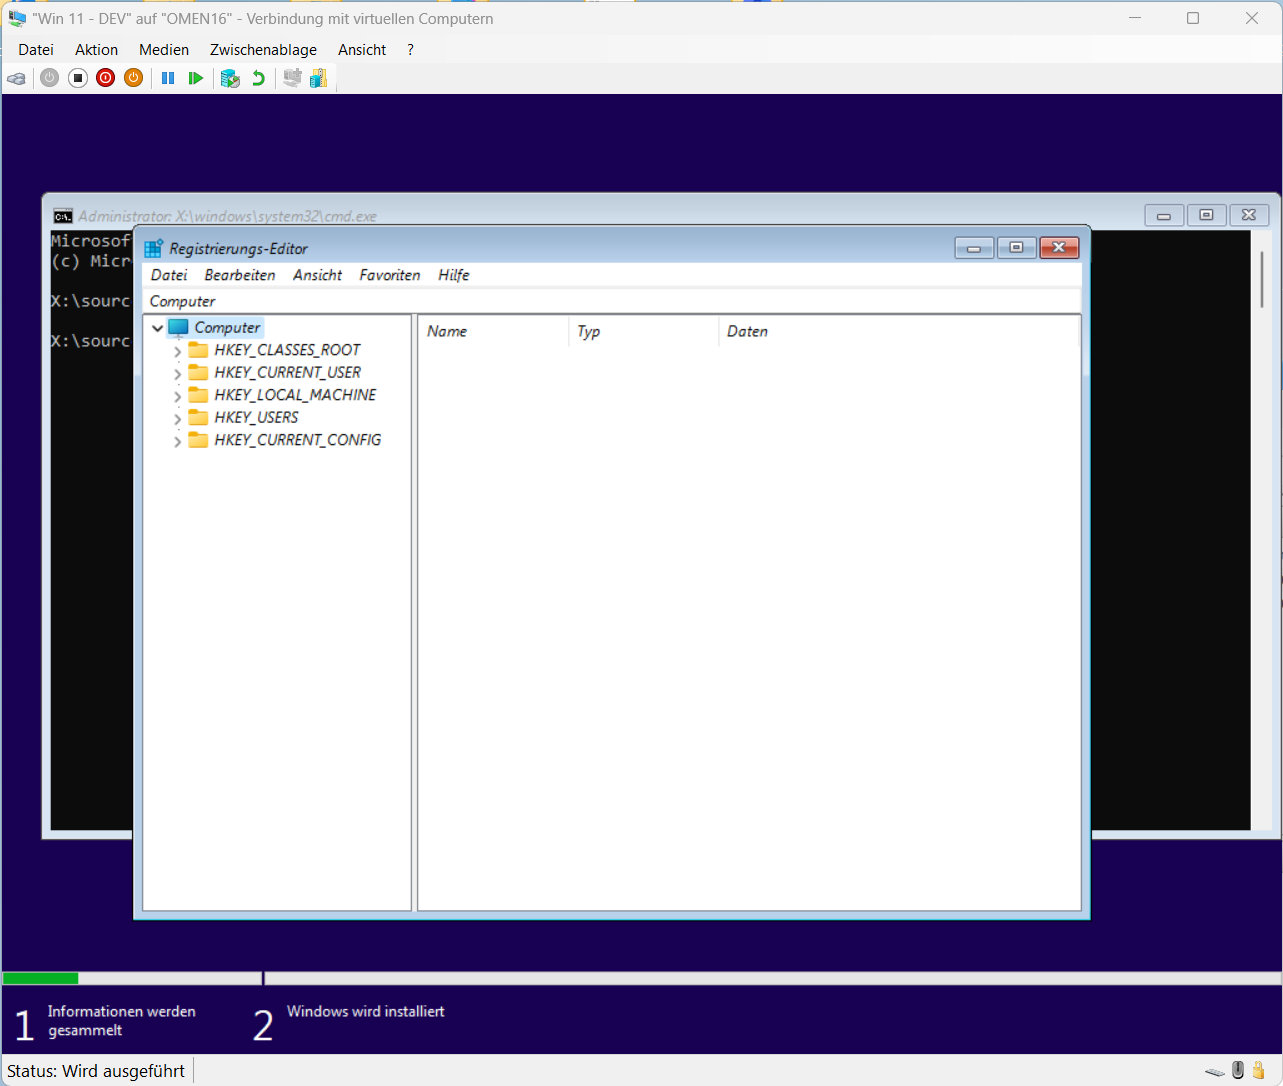
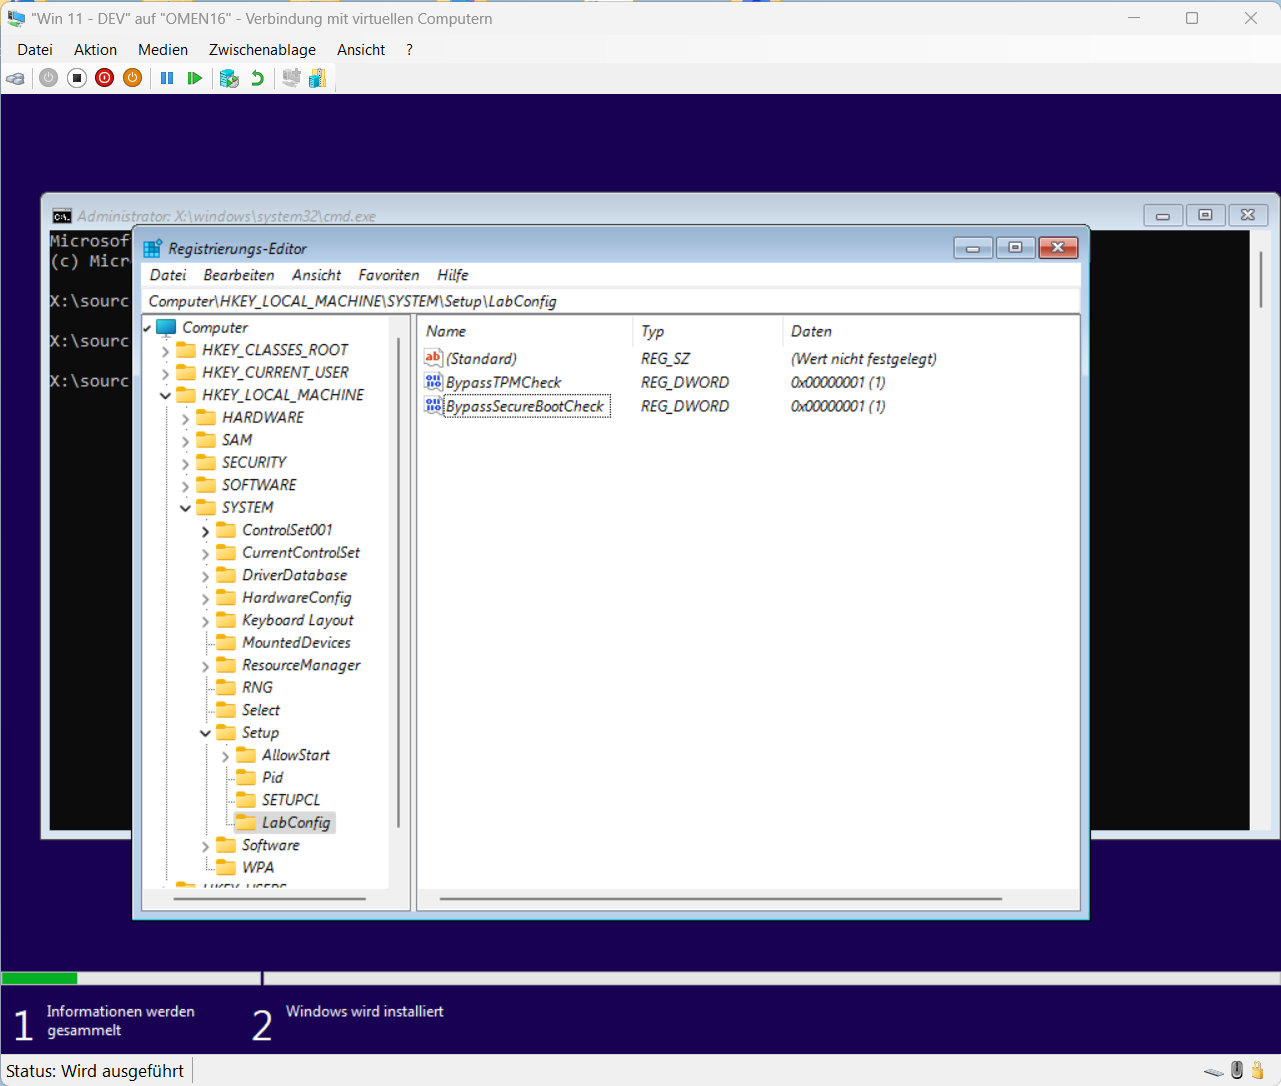
Inside the Registry Editor you have to Navigate to “HKEY_LOCAL_MACHINE\SYSTEM\Setup” and create a new Key called “LabConfig“.
Inside of “LabConfig” you create the DWORD 32Bit Entrys “BypassTPMCheck” and “BypassSecureBootCheck” with a value of “1“.
After adding those entrys you can close the Registry Editor and go one step back inside the Setup Wizard to “refresh” the page/the checks.
Now the requirement checks should be disabled and you can install Windows 11 without worries.
The only downside on bypassing the checks is, that you might get fewer Windows Updates because your PC doesn’t fulffill all system requirements.
TL;DR:
- [Shift]+[F10]
- Command Line => “regedit“
- Registry Editor Path => “HKEY_LOCAL_MACHINE\SYSTEM\Setup“
- Right Click => New => Key => “LabConfig“
- Open “LabConfig”
- Right Click => New => Dword 32Bit => “BypassTPMCheck” => Value: “1“
- Right Click => New => Dword 32Bit => “BypassSecureBootCheck” => Value: “1“
Creating a bootable USB Drive with Rufus
If you install Windows 11 on a regular basis on older PCs the upper method might be quit slow and hinder your workflow. To speed up things you could also create a bootable USB Drive which already skips these checks.
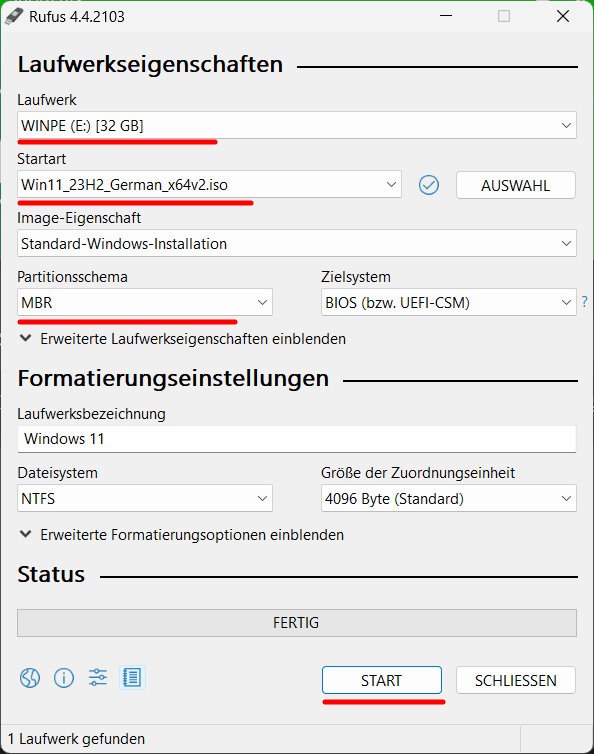
To do that you have to download “Rufus” and a “Windows 11 ISO“.
After downloading Rufus you have to execute it and select your USB Drive (at least 8GB) and Windows 11 ISO.
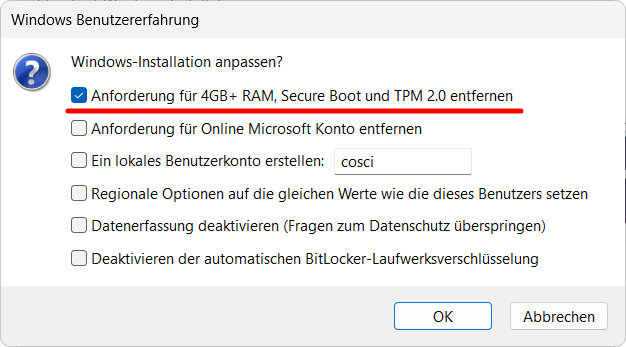
As Partition Sheme you have to select “MBR”, after that you can Start the copy process. Before the processing of your task starts, you will be asked if you want to “disable the TPM and Secure Boot checks“. If you want, you can also disable the need for a Microsoft Account and switch to a local user. After the task is finished you can eject the USB Drive and use it.
If you want to Update your USB Drive you have to redo the whole process.
TL;DR:
- Download Rufus
- Download Windows 11 ISO
- Run Rufus
- Select a USB Drive
- Select your Windows 11 ISO
- Partition Scheme => “MBR“
- Start => Disable TPM and Secure Boot check


